
How to Solve the Top 10 WeCreat Problems Fast
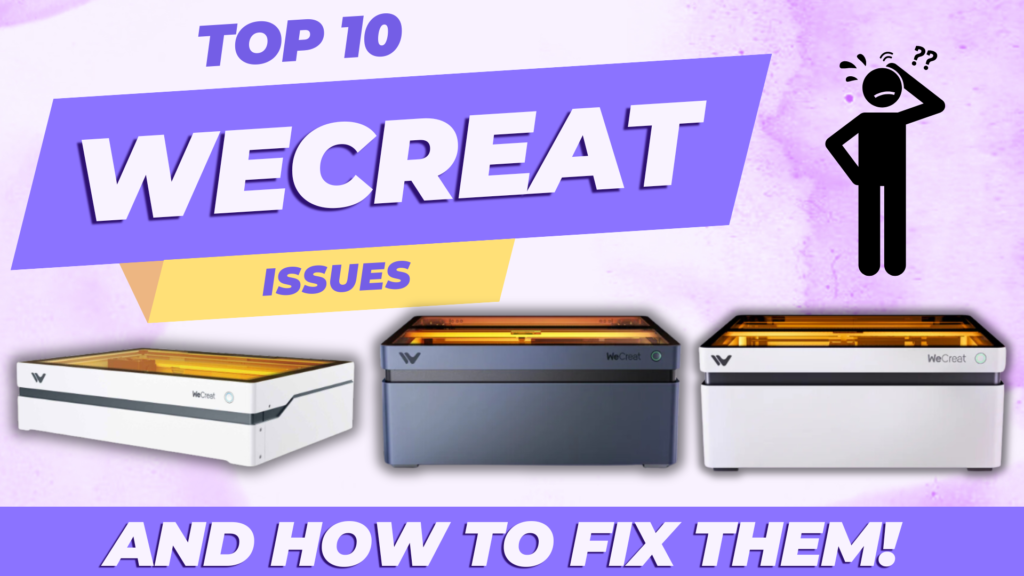
There’s nothing more frustrating than being on a tight deadline, your WeCreat laser engraver fired up and ready to go—except it’s not working right. If you’ve got WeCreat Problems, you’ve come to the right place!
You’ve got designs to cut, orders to fulfill, or maybe that last-minute gift you promised to make, but instead, you’re stuck troubleshooting a machine that just won’t cooperate.
Whether it’s misaligned engravings, overheating issues, or a laser that won’t even turn on, these problems can turn your crafting dreams into a nightmare.
But don’t worry, you’re not alone—let’s dive into the most common WeCreat problems and how to fix them so you can get back to creating without the headaches.
WeCreat Problem #1: Engraving or Cutting is Offset
You’re all set to create a beautiful custom piece from basswood, and every second counts because your project deadline is looming. You’ve meticulously set up your design in the software, positioned your material perfectly on the laser bed, and hit start, expecting the laser to follow the exact path.
But instead, the design drifts off the material, cutting half of your intricate pattern into thin air and leaving you with a ruined piece of basswood.
This scenario is not just frustrating—it’s costly, time-consuming, and can feel like a massive setback when you’re on a deadline.
Troubleshooting Tips
Offset problems like this happen when the laser head isn’t calibrated correctly or when the X-axis alignment is off. Here’s how you can troubleshoot and fix the issue:
- Calibrate Your Camera
- Start by calibrating the camera in the WeCreat software. Camera calibration ensures that the software correctly interprets where your material is on the bed, which is crucial for aligning your design perfectly with the material.
- Go to Settings and click on Camera Calibration. Then follow the on screen instructions. You will need a clean sheet of basswood that is 420mm x 290 mm long.
- Adjust the X-Axis Alignment:
- Misalignment of the X-axis can cause the laser to drift during cutting.
- Check that the X-axis is properly aligned and that the belts are tight. Use the L-shaped screwdriver provided with your machine to adjust the position until the laser module lines up perfectly on both sides.
- You can find instructions by WeCreat on how to do this here.
- Adjust Design Position Values:
- If you’ve calibrated and aligned everything but still see drift, enter specific offset values directly in the design’s position settings.
- For example, if your design consistently shifts 2mm to the right, you can correct this by adjusting the X position of your design by -2mm.
These adjustments can save you time, material, and frustration, helping ensure that every cut lands exactly where it should—keeping you on track with your projects.
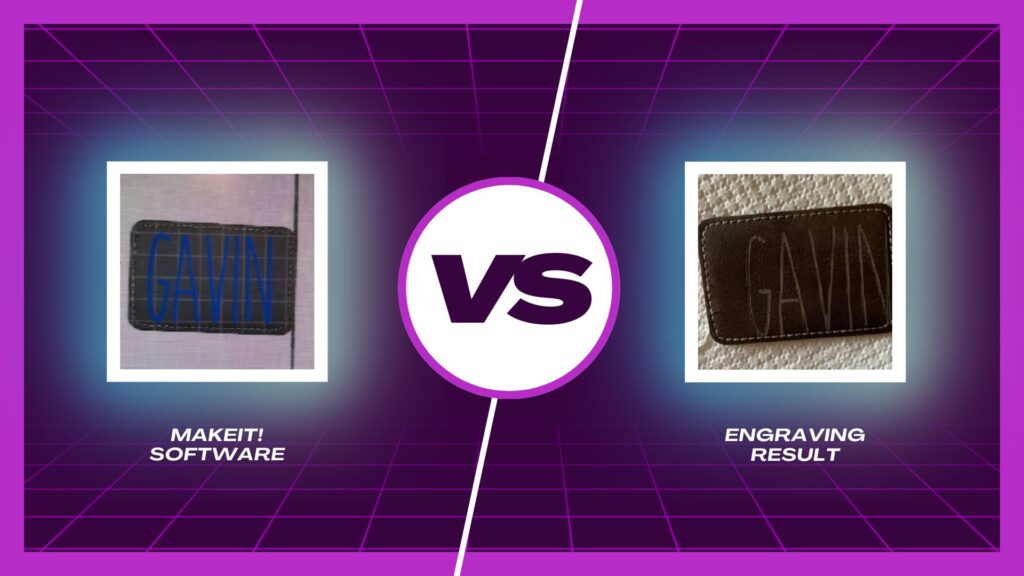
WeCreat Problem #2: Image Distortion During Engraving
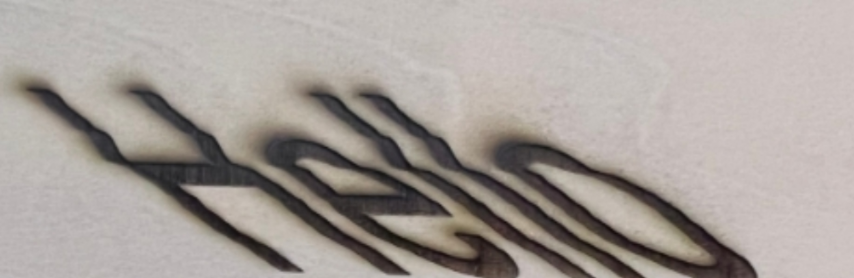
Imagine you’re engraving a beautiful quote onto a wooden plaque—perfect for a gift or your latest Etsy order. You’ve spent time carefully designing the text in your software, selecting the perfect font and size to fit just right.
But when the engraving starts, the text comes out looking stretched and distorted, completely different from what you saw on your screen. Instead of crisp, balanced lettering, the text looks elongated, making your carefully crafted design look sloppy and unprofessional.
This kind of image distortion can occur for several reasons, often related to how the machine interprets the design dimensions versus how it executes them on the material. This is one of the more common WeCreat Problems people encounter.
Troubleshooting Tips
- Ensure Your Machine is Level:
- One common cause of distorted engravings is an uneven machine setup.
- Even the slightest tilt can affect how the laser moves, leading to stretched designs.
- Place your laser on a flat, stable surface and double-check that all corners are level.
- Check Belt Tension and Alignment:
- A loose or misaligned belt on the X or Y axis can cause the laser head to move unpredictably, resulting in distorted engravings.
- Inspect the belts to ensure they are neither too loose nor too tight and that they run parallel without any twists.
- Tighten or adjust them as necessary to keep the laser path accurate to what you see in the MakeIt! software.
- Inspect for any cracking or tears in the belt – this means the belt must be replaced.
- See instructions from WeCreat here!
- Run a Test Engraving:
- While you’re troubleshooting and Before committing to your final project, run a test engraving on a scrap piece of material.
- Have your machine line engrave a square on the test material.
- If all 4 sides of the square are straight, you’re good to go!
- This quick check allows you to spot any distortion issues before wasting valuable materials on a misaligned job.
- While you’re troubleshooting and Before committing to your final project, run a test engraving on a scrap piece of material.
By carefully maintaining and calibrating your WeCreat laser engraver, you can prevent frustrating issues like stretched text and ensure your designs look just as good on the material as they do in the software.
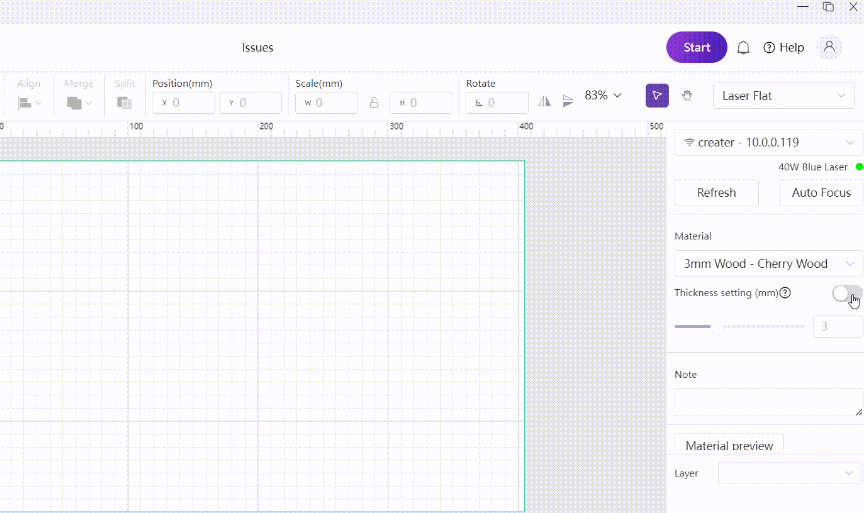
WeCreat Problem #3: Autofocus Failures
You’ve got a shiny new Rainbow Tumbler set up on the rotary attachment, ready to engrave a custom design that’s sure to impress.
You’ve adjusted everything, set your design in the software, and hit start—only to find that the laser won’t autofocus. The machine struggles, repeatedly trying to focus but failing to detect the surface of the tumbler, leaving you stuck and frustrated.
This autofocus issue is common, especially when working with reflective materials like stainless steel tumblers. The calibration laser, which is supposed to detect the height of the material, can be thrown off by the shiny surface, reflecting the laser beam away and causing the machine to misread the focal point.
Here’s how you can troubleshoot and fix this WeCreat problem:
Troubleshooting Tips
- Clean and Check Connections:
- First, ensure all cables are securely connected and that the autofocus sensor is clean.
- Dust or debris can interfere with the sensor’s ability to function correctly, so keeping it clean is crucial.
- Apply Masking Tape:
- If the material is too reflective or too dark to be picked up, a simple fix is to apply masking tape to the surface where the laser will focus.
- The tape helps the laser detect the surface by eliminating reflections, allowing the machine to accurately gauge the material height.
- Once the laser has focused, you can remove the tape before starting the engraving.
- Lighting:
- Make sure you don’t have too much lighting around your WeCreat. This can throw off the camera used for finding material height
- Manual Focus:
- If the autofocus still fails, you can manually set the focus by adjusting the laser head position using the box for material thickness for flat engraving or the diameter or perimeter for rotary engraving.
- You will typically get a warning pop up when you start engraving.
- This method may take a bit of practice but ensures that the laser is at the correct distance for engraving.
- I don’t recommend that you try this if you’re a beginner, because if you do this incorrectly, you can crash the machine into your material and do some serious damage
- Check the Rotary Attachment Setup:
- Make sure the rotary attachment is securely installed and that the tumbler is placed evenly without any wobble.
- An unstable setup can confuse the autofocus system, leading to repeated calibration failures.
- Is the laser going to the right spot?
- The Laser will try to auto focus in the center of your design. If you have other designs on the canvas in another spot, It may think the material is in a different spot than it really is.
- Delete or set to ignore for processing on any designs you aren’t cutting now.
With these steps, you can bypass autofocus issues and ensure your engravings come out perfectly on your tumblers, saving you time and preventing wasted materials.
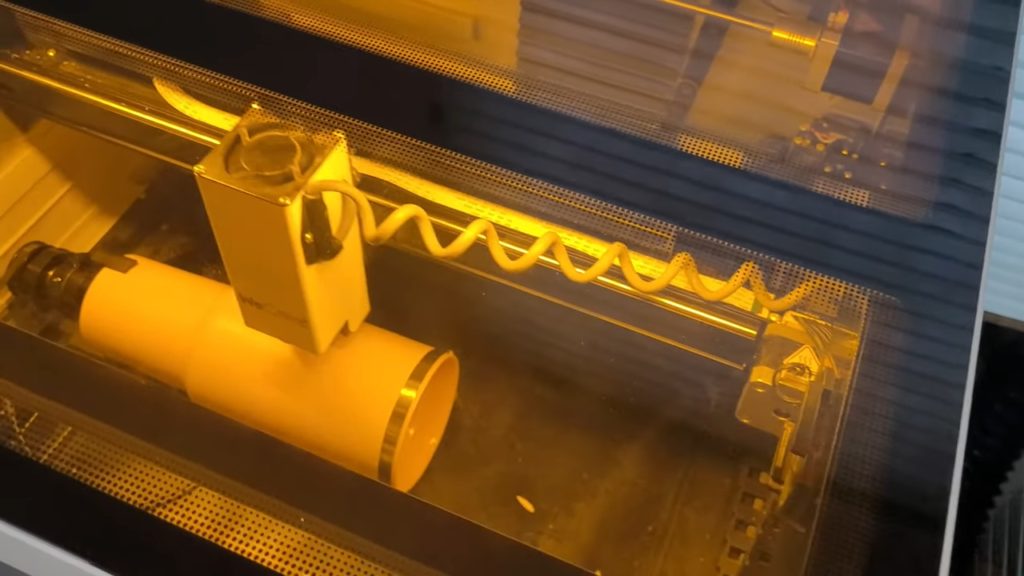
WeCreat Problem #4: Laser Head Overheating
You’re in the middle of a large engraving job on a piece of acrylic, and everything seems to be going smoothly—until you notice the laser head starting to get excessively hot. The machine slows down, and you can smell the faint odor of overheating components.
The project stops midway, leaving you with half-finished work and the anxiety of potentially damaging your machine.
Overheating issues can significantly disrupt your work, especially during long or high-intensity engraving sessions. These cooling related WeCreat problems often arise when the laser is running at high power for extended periods, or when ventilation and cooling systems aren’t functioning properly.
Here’s how you can address overheating and keep your machine running cool:
Troubleshooting Tips
- Check Cooling Systems:
- The first step is to inspect all cooling fans and heat sinks on the laser head.
- Dust buildup can block airflow, reducing the efficiency of the cooling system.
- Clean the fans, remove debris, and ensure that all cooling components are working correctly.
- To access the heatsink, remove the 4 screws holding the laser cooling fan in place. Lift the fan out of the housing and the heatsink is underneath.
- The first step is to inspect all cooling fans and heat sinks on the laser head.
- Adjust Power and Speed Settings:
- Running your laser at maximum power and speed can generate excessive heat.
- Try lowering the power settings while slowing down the engraving speed slightly.
- For a long cut in basswood on the 20w Vision, instead of 100% power at 7 speed, I like to do 90% power and 5 speed.
- You may have to do some testing to figure out the right settings for your machine, as they are all slightly different.
- These adjustments can reduce the amount of heat generated without significantly affecting the quality of your engravings.
- Improve Ventilation:
- Place your laser engraver in a well-ventilated area to help disperse heat.
- If possible, use an external fan or cooling system like the WeCreat Booster Fan to improve airflow out of the machine.
- This extra airflow can be particularly helpful in maintaining a stable temperature during prolonged use.
- Pause Between Jobs:
- If you’re working on multiple projects back-to-back, give your machine a few minutes to cool down between jobs.
- Keep your WeCreat Booster Fan running while the machine is resting to help extract some heat. This simple step can prevent overheating and extend the life of your laser engraver.
Taking these steps can prevent the laser head from overheating, ensuring that you maintain consistent engraving quality and avoid costly repairs. By managing the machine’s temperature effectively, you can keep your projects on track and your equipment in top condition ensures consistent engraving quality and protects your investment in your equipment.
WeCreat Problem #5: WeCreat Laser Does Not Emit Light
You’ve set up your WeCreat laser engraver for a simple project, double-checked the settings, and hit start—but nothing happens. The laser head moves as if it’s working, but no light comes out when engraving.
The frustration sets in as you stare at an untouched piece of material, knowing something’s wrong but not quite sure what it is. When your laser doesn’t emit light, it can be a simple fix or a sign of a deeper problem with your Wecreat Laser.
Here’s how you can troubleshoot this issue and get your laser back up and running:
Troubleshooting tips:
- Ensure the Power Cable is Firmly Plugged In:
- This may seem obvious, but loose power connections are one of the most common reasons for a laser not emitting light.
- Make sure the power cable is securely plugged into both the machine and the wall outlet.
- Wiggle the connections slightly to check if they are loose
- Make sure the power switch on the back of the machine is turned on.
- Double Check the Cables Connected to the Laser Head:
- The cables connecting the laser head to the main unit can sometimes come loose, especially after frequent use or transport.
- Inspect these connections and ensure they are firmly seated.
- If they’re loose or appear damaged, re-secure them or replace as necessary.
- Even a slightly disconnected cable can prevent the laser from functioning correctly.
- Inspect the Laser Lens for Obstructions:
- Dirt, debris, or even a small piece of tape can obstruct the laser lens, preventing the laser beam from reaching your material.
- Gently clean the lens with a soft, lint-free cloth and ensure nothing is blocking it. B
- e careful not to scratch the lens as this can impact the laser’s performance.
- A clear lens is essential for the laser to function as intended.
By following these steps, you can often resolve the issue of a non-emitting laser quickly and avoid unnecessary downtime. Keeping your connections tight and your lens clear ensures your WeCreat laser engraver remains reliable and ready for your next project.
WeCreat Problem #6: Workspace Not Displaying in Software
You’ve just spent time carefully setting up your design, but when you open the WeCreat software, the workspace is nowhere to be seen. You try restarting the program, but the same blank screen stares back at you, leaving you unable to position your design on the virtual material.
Without the workspace displayed, it’s impossible to align your project properly, leading to mistakes and wasted materials.
This issue usually arises from software or firmware compatibility problems, incorrect settings, or display errors. Here’s how you can troubleshoot and fix these common WeCreat problems to get your workspace back on screen:
Troubleshooting Tips
- Ensure Your Software and Firmware Are Up to Date:
- The first step is to make sure that both your software and the laser’s firmware are updated to the latest versions.
- Compatibility issues between outdated software and newer firmware often cause display problems.
- Check the WeCreat website for updates and follow the instructions to install them.
- Restart the Software and Computer:
- Sometimes, a simple restart can resolve minor glitches.
- Close the WeCreat software, restart your computer, and reopen the program.
- This refreshes the system and can often restore the missing workspace.
- Check Display Settings:
- Occasionally, the workspace might be displaying off-screen due to incorrect display settings.
- Go to your software’s display options and reset them to default.
- If you’re using multiple monitors, ensure the software is opening on the correct screen.
- Check the Camera Connection:
- Another issue may be the camera plug has come loose.
- You can open the access panel and unplug the camera, then plug it back in.
- See directions on how to do this from WeCreat here.
- Reinstall the Software:
- If the workspace is still not showing up, it may be time to uninstall and reinstall the WeCreat software.
- A clean install can resolve corrupted files or settings that might be causing the display issue.
- Before uninstalling, make sure to back up any custom settings or designs you don’t want to lose.
Following these steps should help you bring the workspace back, allowing you to position your designs accurately and continue your projects without delay.
Keeping your software, firmware, and display settings properly maintained ensures a smooth and frustration-free engraving experience.
WeCreat Problem #7: USB Connection Problems
You’re all set to start your engraving, but when you press start, nothing happens. The machine isn’t responding, and you’re left staring at the screen, wondering what went wrong.
You double-check the software, restart the job, but the WeCreat laser engraver still won’t connect. USB connection issues are frustrating, especially when they stop your project dead in its tracks.
These connection problems can occur for various reasons, from loose cables to outdated drivers. Here’s how you can troubleshoot and resolve USB connection issues to get your laser back on track:
Troubleshooting Tips
- Ensure the USB Cable is Securely Connected:
- Start with the basics—check that your USB cable is firmly plugged into both the machine and your computer.
- Wiggle the cable slightly to see if the connection is loose, as even minor shifts can disrupt communication between the engraver and your computer.
- For more stable connectivity, try using a high-quality, shorter USB cable, as longer cables can sometimes cause signal degradation.
- Make sure your cable is in good shape, with no tears or kinks.
- Double-Check USB Ports and Try a Different One:
- Sometimes, the USB port on the computer itself can be the problem.
- Try plugging the cable into a different USB port on your computer to see if this resolves the issue.
- Ports can wear out over time or suffer from internal faults that affect their functionality.
- Restart Your Computer and Laser Engraver:
- A full restart of both your computer and the engraver can refresh the connection and resolve minor communication glitches.
- Turn off both devices, wait a few seconds, then turn them back on and try reconnecting.
- Check for Interference from Other Devices:
- Other USB devices connected to your computer, such as printers or external drives, can interfere with the laser engraver’s connection.
- Disconnect any unnecessary devices to reduce interference and see if the engraver connects properly when it’s the only device plugged in.
- Reinstall the WeCreat Software:
- If all else fails, reinstall the WeCreat software to ensure there are no corrupted files or settings causing the USB connection issue.
- This can help reset the communication protocols and restore proper connectivity.
By following these steps, you can troubleshoot and fix USB connection issues, ensuring that your WeCreat laser engraver remains responsive and ready for your next project.
Keeping cables secure, drivers updated, and ports checked regularly will help maintain a reliable connection between your computer and your engraver.
WeCreat Problem #8: Laser Gets Stuck During Movement
You’re midway through engraving a delicate design on glass when suddenly, the laser head stops moving. The engraver stalls, stuck in one spot, and your project is at a standstill. Maybe your WeCreat made a grinding noise right before it stopped.
This issue can be particularly nerve-wracking when you’ve already invested time and materials, only to be interrupted by a laser that refuses to budge.
This problem often occurs due to motor faults, loose connections, or obstructions in the movement path. Here’s how to troubleshoot and get your laser moving smoothly again:
Troubleshooting Tips
- Inspect Motor Connections:
- Loose or disconnected motor cables are a common culprit when the laser head gets stuck.
- Open the machine’s access panel and check that all motor wires are securely connected and in good condition.
- A loose or damaged wire can cause the motor to lose power, preventing movement.
- You can see how to inspect the connections from WeCreat here.
- Check for Obstructions:
- Debris, dust, or even small offcuts of material can get lodged in the movement path of the laser head.
- Turn off the machine and carefully inspect the area around the laser rails and belts.
- Clear away any obstructions that might be impeding movement, and make sure the rails are clean and free of dust buildup.
- Align the Rails and Tighten Belts:
- Misaligned rails or loose belts can cause the laser head to struggle during movement, often resulting in it getting stuck.
- Use the tools provided by WeCreat to realign the rails and tighten any loose belts.
- Proper alignment ensures the laser head moves smoothly without resistance.
- See WeCreat’s instructions here.
- Lubricate the Z-Axis Lead Screws:
- If the laser gets stuck during vertical movement, the issue might lie with the Z-axis lead screws.
- If it sounds stiff or unresponsive, or you hear grinding, the z axis screws may need some white lithium grease to ensure they turn smoothly
Regular maintenance and thorough checks can help prevent movement issues and keep your laser running smoothly. A well-maintained machine ensures uninterrupted engraving sessions and high-quality results every time.
WeCreat Problem #9: Misaligned Engraving
You’ve carefully set up your design, aligned everything in the software, and hit start, expecting perfection. But when the engraving finishes, the result is crooked, with lines that don’t match up.
Misaligned engravings can make your projects look unprofessional, wasting both time and materials.
Misalignment is often caused by loose components or improper calibration. Here’s how to fix this issue and ensure your engravings come out perfectly aligned:
Troubleshooting Tips
- Tighten Pulleys and Belts:
- Misaligned engravings are frequently due to loose belts or pulleys that allow the laser head to shift unpredictably.
- Check all belts and pulleys for tightness and make adjustments as needed.
- A snug fit ensures that the laser follows the exact path you’ve set in the software.
- Calibrate the X and Y Axes:
- Proper axis calibration is crucial for maintaining alignment during engraving.
- Use the calibration settings in the WeCreat software to ensure that the X and Y axes are perfectly perpendicular and correctly positioned.
- Calibration prevents drift and keeps your designs straight.
- Secure Your Material:
- If the material isn’t securely fastened to the bed, even slight movements during engraving can cause misalignment.
- Use strong adhesive mats, clamps, or tape to hold your material firmly in place.
- This stability helps the laser track correctly and prevents skewed results.
- Perform a Test Run:
- Before starting your final project, run a quick test engraving on a scrap piece of material.
- This test allows you to catch alignment issues early, so you can make adjustments before working on your actual project.
By following these steps, you can eliminate misalignment issues and produce precise, professional-looking engravings every time.
WeCreat Problem #10: Laser Won’t Complete Jobs
You’re halfway through a complex engraving on a large metal sheet, and suddenly, the laser stops. The machine powers down or resets, leaving your project unfinished and your material wasted.
This problem is especially frustrating when you’re on a deadline or working with expensive materials.
When the laser won’t complete jobs, it’s often due to power supply issues, unstable connections, or overloaded job queues. Here’s how to troubleshoot and keep your engraver running smoothly from start to finish:
Troubleshooting Tips
- Ensure the Power Supply is Stable:
- Fluctuations in power can cause the machine to stop unexpectedly.
- Check that the power cable is securely plugged in and that your outlet is providing consistent power.
- Using a surge protector can also help prevent sudden shutdowns due to power spikes.
- Double-Check Data Connections:
- USB or other data cables that aren’t firmly connected can interrupt the job.
- Ensure all cables are properly seated and secure, and avoid moving them during the engraving process.
- If the problem persists, try using a different, higher-quality cable.
- Inspect for Overheating:
- If your laser is stopping after extended use, overheating might be the issue.
- Allow the machine to cool down between jobs, especially during long or high-intensity sessions.
- Keeping the engraver cool helps prevent premature shutdowns and maintains performance.
By maintaining stable power, secure connections, and managing job queues effectively, you can prevent job interruptions and ensure your WeCreat laser engraver completes every project as planned.
Conclusion
Running into problems with your WeCreat laser engraver can be incredibly frustrating, especially when you’re on a deadline or working on a special project. From misaligned engravings to overheating issues and USB connection problems, these challenges can disrupt your workflow and waste valuable materials.
However, by taking proactive steps like checking your machine’s alignment, tightening belts, ensuring stable connections, and keeping your software up-to-date, you can overcome these common obstacles and keep your engraver running smoothly.
Whether it’s troubleshooting an unresponsive laser head, fixing distorted engravings, or resolving movement issues, these tips will help you get back to creating high-quality designs without the headaches. But don’t stop here—there’s so much more to learn!
For additional guidance, project ideas, and advanced tips, make sure to explore our other articles on cricuter.com. Plus, check out our YouTube channel, where we dive deeper into laser engraving projects, offer step-by-step tutorials, and share creative inspiration to help you master your WeCreat laser engraver.
Stay tuned, keep creating, and let’s make every project a success together!
Cricuter’s Recommended Deals
- Sign up for Creative Fabrica’s FREE trial
- Sign up for Creative Fabrica’s discounted yearly subscription
- Shop the best deals on Cricut machines
- Accept credit card payments with your FREE Square Card Reader
- Check out my Linktree
Connect with Cricuter
Some of the links provided are affiliate links. Cricuter is a participant in the Amazon Services LLC Associates Program, an affiliate advertising program. As an Amazon Associate,