Top 10 Cricut Problems and How to Solve Them
Welcome Cricuters! Today, we’re going to talk about some of your most common Cricut Problems and how to solve them. Leave a comment with your most frustrating Cricut problem!
We’ve all been there—everything is going smoothly, and you’re in the zone with your Cricut project. Maybe you’re halfway through cutting out custom designs for a set of wedding wine glasses, or you’re just about to add the finishing touches to a personalized stuffed animal for a baby shower.
Then suddenly, something goes wrong with your Cricut machine, and that sinking feeling hits. Your fun crafting session comes to a grinding halt, and the clock is ticking. You’ve got a tight project schedule to stick to, and now you’re scrambling to figure out what’s wrong and how to fix it, all while worrying if you’ll even get the project done in time.
But don’t worry! In this post, I’m going to walk you through the top 10 Cricut problems that can interrupt your crafting sessions, and more importantly, how to fix them so you can finish that custom wine glass, personalized stuffed animal, or those print-then-cut stickers without breaking a sweat!

Want to take the frustration out of crafting with your Cricut? Cricut For Dummies is your go-to guide for mastering your machine, troubleshooting common issues, and getting the most out of your projects. Whether you’re struggling with cutting problems, Design Space glitches, or material mishaps, this book breaks it all down in an easy-to-follow way—so you can spend less time troubleshooting and more time creating! Preorder your copy now! Available 6/17/2025.
Cricut Problem #1: Cricut Machine Won’t Power On
You’re ready to start crafting custom wine glasses for your friend’s wedding, everything is laid out perfectly, and you go to power on your Cricut—only to find that nothing happens. The machine stays off, and now, instead of diving into your project, you’re stuck troubleshooting. With a deadline looming, your already tight schedule just got even tighter.
Power issues are easily one of the most common Cricut problems. Don’t worry though, most of the time the problem is really simple to fix!
How to Solve It:
Check the power cord:
Make sure it’s securely connected to both the machine and the outlet. It’s an easy step to overlook in the rush to start a project.
Make sure the cord is firmly plugged into the power block. Sometimes it’s really easy to accidentally unplug it when walking by
Test the outlet:
Try plugging another device into the same outlet to check if the outlet is working. This will help you figure out whether the issue lies with your Cricut or the electrical system in your home.
If the other device doesn’t work either, check your circuit breaker panel to see if a breaker has tripped and reset it if necessary.
Inspect the power cord for damage:
Inspect the power cord closely for any signs of damage. Look for frayed or exposed wires, bends, or kinks in the cord that could indicate a break inside.

Also, check for any burn marks or discoloration around the plug or along the cord, as this could be a sign of electrical issues. If you notice any of these signs, it’s best to stop using the cord and replace it to avoid potential hazards. You can find a list of replacement Cricut parts here.
Cricut Problem #2: Design Space Not Loading
You’ve just come up with a brilliant idea for some custom print-then-cut stickers for your kid’s birthday party, and you’re excited to bring it to life. But just as you’re about to start the design, Design Space decides not to load. Talk about frustrating!
Design Space problems can be one of the most frustrating Cricut problems you will run into, because it might seem like you don’t have any control over a computer program.
The good news is that most of the time the fix is very easy, even though it can be a little inconvenient.
How to Solve It:
Clear your browser’s cache:
Sometimes, all the data stored by your browser can slow things down. Clearing the cache gives Design Space a fresh start.
To clear your browser cache, follow these steps:
- Open your browser and go to the settings or menu (usually represented by three dots or lines in the upper right corner).
- Select “History” or “Privacy & Security” from the menu options.
- Look for an option that says “Clear browsing data” or “Clear cache.”
- Choose the time range you want to clear (select “All time” for a full clear).
- Check the box for “Cached images and files.”
- Click “Clear data” or “Clear cache.”
Your cache will now be cleared, which should help improve the performance of web pages like Design Space!
Update your software:
Make sure both your browser and Design Space are up-to-date.
If Cricut Design Space will open but not load, follow these steps:
- Open Cricut Design Space on your computer.
- If there’s an update available, a prompt will usually appear when you open the program. Click “Update” to start the process.
Once the update is complete, restart the program to ensure everything runs smoothly.
If Design Space won’t load at all, uninstall the software, then download it from Cricut and reinstall it.
Check your internet connection:
A slow connection can cause Design Space to freeze or not load at all. Try resetting your router by unplugging it, leave it unplugged for about 1 minute, then plug it back in.
Cricut Problem #3: Material Not Cutting Through
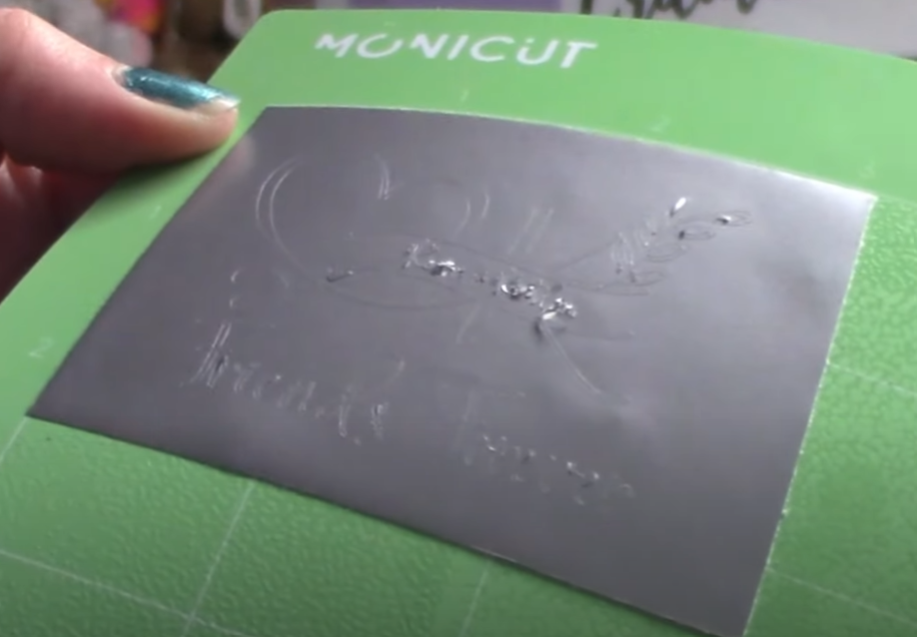
Picture this: you’re in the middle of personalizing a stuffed animal for a baby shower gift, and after the first cut, you realize the iron-on vinyl didn’t cut all the way through. Now you’re left with a frustrating mess of totally ruined vinyl! Now what do you do?
How to Solve It:
Perform a Test Cut:
Before jumping into your full design, always perform a small test cut in an unused corner of your material. This simple step allows you to check if your settings are correct for the material you’re using, especially with tricky materials like glitter vinyl or thicker iron-on vinyl.
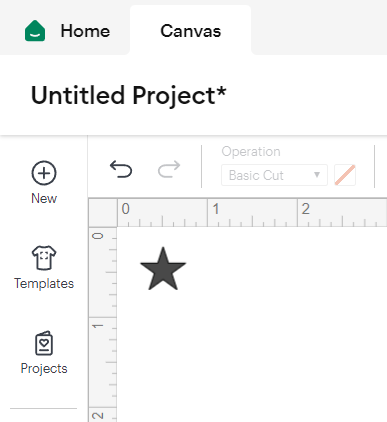
I like to use a half inch star for my test cuts. Click on Shapes on the left toolbar, then select the star.
It’s much easier to make adjustments on a small test piece than waste an entire sheet of material.
This can be a real lifesaver, saving you time and frustration when working with a variety of materials that may need different settings.
Adjust Your Blade Settings:
Ensure that you’ve selected the appropriate material in Cricut Design Space to automatically adjust the blade’s pressure and cutting depth. If your Cricut still isn’t cutting through correctly, you can manually tweak the pressure settings to increase or decrease the blade force.
For thicker materials, increasing the pressure can help the blade cut all the way through, while for more delicate materials, reducing pressure can prevent over-cutting or tearing.
Choose the Correct Mat:
The right mat plays a huge role in getting a clean cut, especially when working with thicker materials like iron-on vinyl or faux leather.
For heavier materials, use the StrongGrip mat to ensure your material stays firmly in place during the cutting process.
A less sticky mat, like the StandardGrip or LightGrip, may allow thicker materials to move around during cutting, causing uneven cuts or damaging your design.
Always match your mat to the material you’re working with to avoid issues.
Cricut Problem #4: Blade Dragging or Cutting Incorrectly
You’ve got a set of personalized wine glasses lined up to make for your Etsy shop, but as your Cricut starts cutting the vinyl decals, the blade drags through the material, leaving jagged lines instead of clean cuts.
How to Solve It:
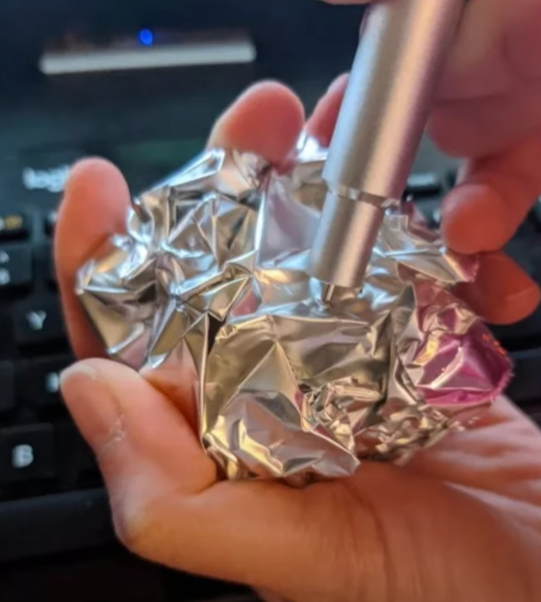
Clean the Blade:
Over time, tiny bits of vinyl, paper, or other materials can get stuck on your Cricut blade, which can cause the blade to drag and result in uneven cuts.
To clean the blade, press the plunger down to expose the blade and carefully stab it into a crinkled up ball of aluminum foil.
For more stubborn bits, you can use a compressed air canister to blow out any lodged material. Regular cleaning helps maintain smooth and accurate cuts.
Check out my Cricut Blade Replacement Guide on YouTube to see how to replace your Cricut blade, when to replace your Cricut blade, and where to find blades for a great price.
Replace the Blade:
If cleaning the blade doesn’t improve your cuts, it might be time to replace the blade, especially if you’ve been using it for a while.
To replace the blade, first remove the blade housing from your Cricut machine. Press down on the plunger at the top of the housing to expose the blade, then carefully pull the old blade out.
Insert the new blade by holding the plunger down, then place the new blade into the housing. Release the plunger to lock the blade into place.
Reinstall the housing into your Cricut, and you’re ready to go!
Adjust Pressure Settings:
If you’re still experiencing issues after cleaning or replacing the blade, try adjusting the pressure settings in Cricut Design Space.
Lowering the pressure can help prevent the blade from cutting too deeply and dragging through your material, especially when working with delicate or thin materials.
Fine-tuning the pressure can lead to more precise cuts and reduce wear on your blade.
Cricut Problem #5: Vinyl Not Sticking to Transfer Tape
You’re mid-way through transferring a design for a personalized stuffed animal, but the vinyl just won’t stick to the transfer tape. It’s frustrating, especially when you’re on a deadline. I think we’ve all run into this Cricut problem once or twice.
How to Solve It:
Choose the Right Transfer Tape:
Not all transfer tapes are created equal, and choosing the right one is crucial for getting a smooth transfer.
For standard vinyl, use a medium-tack transfer tape, which offers just the right amount of stickiness to lift your design without damaging it.
Which transfer tape is the best? I love this kind on Amazon!
For more delicate or intricate designs, or when working with glitter or textured vinyl, opt for a higher-tack transfer tape that will provide a stronger grip. This brand makes a super sticky transfer tape!
Conversely, when working with thin or easily damaged materials, a low-tack transfer tape may be a better option to avoid tearing.
If your transfer tape is too sticky, you can try sticking it all over your clothes first. The lint from your clothes will stick to the transfer tape, making it less sticky.
Make sure to match the transfer tape to your vinyl type for the best results.
Burnish Thoroughly:
Burnishing, or pressing the vinyl onto the transfer tape, is an essential step to ensure your design lifts off the backing sheet cleanly.
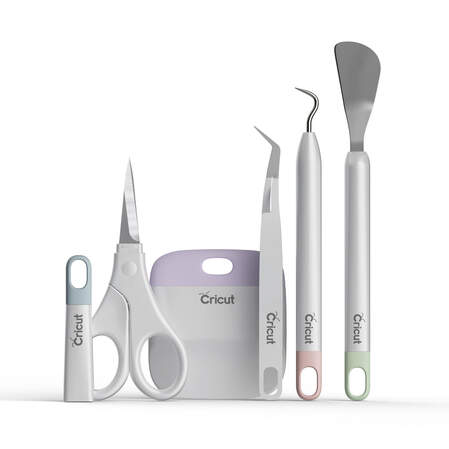
Use a scraper tool, a brayer, (or even a credit card) to apply firm, even pressure across the entire surface of the vinyl. Make sure to burnish from both the front and back sides to guarantee maximum adhesion.
This step ensures that the vinyl sticks securely to the transfer tape and will transfer smoothly when applied to your project surface.
Apply Even Pressure:
When it’s time to remove the transfer tape, patience is key. Slowly peel back the tape at a sharp angle, applying even pressure as you go.
Doing this too quickly can cause parts of the design to stay stuck on the backing paper or become misaligned. If any part of the vinyl doesn’t stick to the surface, pause, and press it down again with the scraper tool before continuing.
Ensuring a slow, steady pull will help your vinyl design transfer without leaving behind any details.
Cricut Problem #6: HTV Not Adhering to Fabric
You’re almost done personalizing a baby onesie, and after pressing the Heat Transfer Vinyl (HTV), you go to peel it back, only to see the vinyl lifting off with the carrier sheet. Now what?
How to Solve It:
Luckily, this is a Cricut problem that can be solved quickly and easily.
Check Your Heat Settings:
Different types of Heat Transfer Vinyl (HTV) require specific temperature settings for proper adhesion. Always refer to the instructions that come with your vinyl to ensure you’re using the correct temperature.
Using too much heat can cause the vinyl to melt or distort, while too little heat won’t fully bond it to the fabric.
If you’re using a heat press, set it to the recommended temperature and time. For an iron, make sure it’s set to the correct setting—typically “cotton” or a similar heat level depending on your vinyl.
You can use a thermal gun to check the temperature of your heat press.
Apply Firm Pressure:
To ensure your HTV bonds securely to the fabric, you need to apply firm and even pressure. Whether you’re using a heat press or an iron, pressing down with consistent force across the entire design is essential.
If using an iron, press down for the full recommended time without moving the iron around, as shifting it can cause the design to move or wrinkle.
A heat press offers more consistent results, but firm pressure is key to a strong bond with either tool.
If you’re using an automatic heat press and your vinyl isn’t sticking, it’s probably because the machine isn’t giving enough pressure. I’m not a fan of automatic heat presses because I find that they often lack the necessary pressure and there’s no way to adjust it.
Bonus Tip – Don’t Forget to Mirror Your Design:
While this can prevent an annoyance more than a Cricut problem, I feel like it’s worth mentioning. When working with HTV, it’s crucial to mirror your design in Cricut Design Space before cutting.
This step ensures that when the vinyl is applied to the fabric, the design will appear correctly.
Forgetting to mirror is one of the most common mistakes when using HTV, so double-check this setting before every cut to avoid wasting material and time.
Cricut Problem #7: Cricut Mat Losing Stickiness
You’re cutting a set of intricate monograms for wine glasses, but halfway through, your material starts sliding around because the mat has lost its stickiness. Suddenly, your perfect design is ruined.
How to Solve It:
Use a Lint Roller:
Over time, debris and material residue can build up on your Cricut mat, reducing its stickiness. Doing a little bit of maintenance now and then can prevent you from having Cricut problems when you’re trying to meet an important deadline.
For a quick clean, especially when the mat isn’t too dirty, a lint roller is a great tool. It’s perfect for picking up dust, fibers, and small debris that can accumulate after multiple uses.
Simply roll it over the surface of the mat to remove unwanted particles and refresh its stickiness.
A scraper tool also works great for scraping off that pet hair and sweater fuzz.
Deep Clean Your Mat:
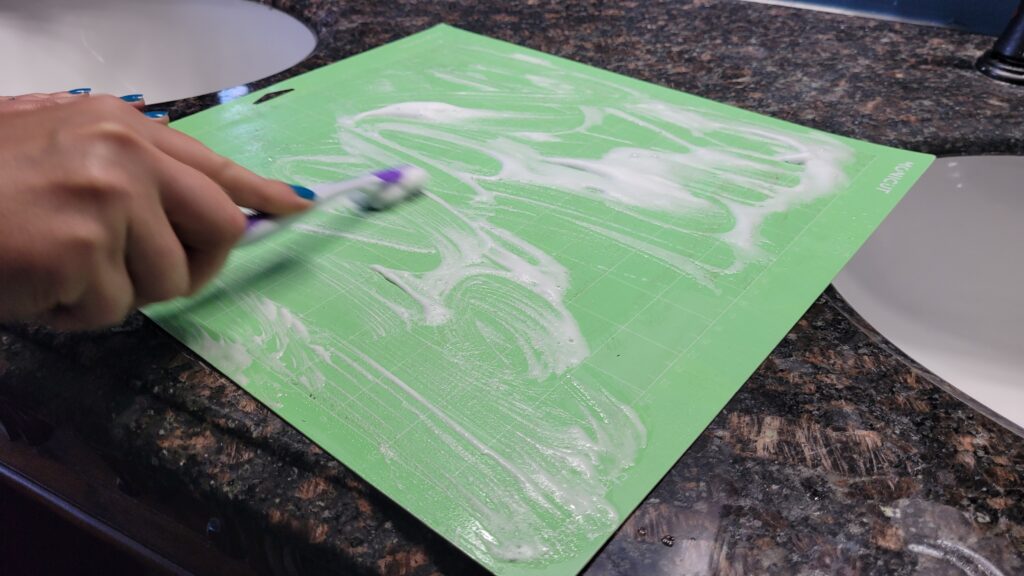
After heavy use, your mat is going to eventually need some deep cleaning. To restore it, gently clean the mat using warm water and mild soap.
Use a soft cloth, toothbrush, or sponge to scrub the surface in circular motions. Avoid using harsh chemicals or scrubbing too hard, as this could damage the adhesive.
Wet wipes also work well for giving your mats a quick scrub down .
After cleaning, let the mat air dry completely before using it again to ensure the adhesive regains its stickiness.
Mats are one of those things that will need to be replaced over time so if your mat is looking too worn out, it’s probably best to replace it altogether.
For a more in depth guide, check out our article on How to Clean Your Cricut Mat.
Cricut Problem #8: Images Not Importing Correctly in Design Space
You’re about to make some adorable print-then-cut stickers for a planner when you realize the images aren’t importing properly. Instead of cute designs, all you see is a giant black box.
How to Solve It:
Use the correct file format:
Use the Correct File Format: Cricut Design Space works most efficiently with .SVG, .PNG, or .JPG files so always ensure your design is saved in one of these formats. You can also use GIF, DXF, HEIC & BMP file types.
Other file types might not import properly or could cause issues with your project.
Resize before uploading:
Large files can slow down Design Space or fail to upload altogether. If your file is too big, try resizing it before importing. This will help it load faster and reduce the chance of glitches. This mostly applies to PNG files, since a high quality PNG file is a lot bigger than an SVG or JPG.
Check for unsupported elements:
Make sure your image doesn’t contain any hidden layers, gradients, or unsupported elements like certain fonts or effects that Design Space might not be able to process.
Simplifying your design will help it import smoothly and prevent you from having to deal with this Cricut Problem.
Cricut Problem #9: Bluetooth Connectivity Issues
You’re ready to start cutting personalized holiday ornaments, but your Cricut won’t connect to your laptop via Bluetooth. Nothing like a tech issue to interrupt a crafting session!
One way to get around this Cricut problem if you’re in a crunch is to use the USB cable to connect to your PC, but it sure can be inconvenient if you don’t have a laptop, or impossible if you are trying to use a mobile device.
How to Solve It:
Restart both devices:
A simple restart can often fix connectivity issues. Turn off both your Cricut machine and your laptop or device, then turn them back on to reset the Bluetooth connection.
Turn off other Bluetooth devices:
Sometimes, nearby Bluetooth devices can interfere with your Cricut’s connection. Try turning off any other Bluetooth accessories or devices in the area to reduce interference.
Reconnect the Cricut:
Head to your laptop’s Bluetooth settings, remove your Cricut device from the list of paired devices, and then reconnect it. This will establish a fresh connection and often resolves any connection issues.
Cricut Problem #10: Cricut Tools Not Working Properly
You’re in the middle of scoring a set of paper flowers for a bridal shower, but your scoring stylus isn’t making those crisp, clean folds like it usually does.
Or maybe you’re trying to cut intricate details with your fine-point blade, but the cuts are jagged, or worse, incomplete.
Perhaps your weeding tool is no longer lifting vinyl as easily, making the whole process frustratingly slow. What now?
This Cricut problem is a really broad topic due to the number of accessories available for the Cricut machines.
There are some basic guidelines than can prevent issues from becoming a regular occurrence in your craft room though.
How to Solve It:
Regular maintenance:
Make sure to clean your tools regularly to prevent material build-up that can affect their performance.
For example, bits of vinyl or paper can accumulate on your blades or weeding tools, causing them to lose precision. Wiping them down after each use will help keep them working like new.
Check compatibility:
Ensure that the tool you’re using is compatible with both your machine and the material you’re working with.
For instance, the Scoring Stylus works best on lighter materials, while thicker materials may require a Scoring Wheel if you’re using a Cricut Maker.
Using the right tool for the job will give you better results.
Replace worn-out tools:
If your tools have been used heavily, they might be worn out and no longer delivering consistent results.
Blades can dull over time, and scoring tools or weeding tools can lose their precision.
Replacing them when they no longer perform well will help ensure your projects come out looking great every time.
Conclusion: Troubleshooting Like a Pro
Every Cricut project has its hurdles, but with these solutions, you can tackle common Cricut problems like a pro.
Whether you’re creating custom wine glasses, personalizing a stuffed animal, or working on print-then-cut stickers, these tips will help you solve problems quickly and keep your projects on track.
From adjusting your blade settings to choosing the right transfer tape, you’re now equipped to handle any Cricut problems with confidence. Happy crafting!
For more Cricut tips and tricks, visit my Cricut Resources Page or check out the selection of crafting supplies in my Etsy shop to get everything you need for your next project!
Cricuter’s Recommended Deals
- Sign up for Creative Fabrica’s FREE trial
- Sign up for Creative Fabrica’s discounted yearly subscription
- Shop the best deals on Cricut machines
- Accept credit card payments with your FREE Square Card Reader
- Check out my Linktree
Connect with Cricuter
Some of the links provided are affiliate links. Cricuter is a participant in the Amazon Services LLC Associates Program, an affiliate advertising program. As an Amazon Associate, I earn a small commission if you make a purchase, at no additional cost to you!