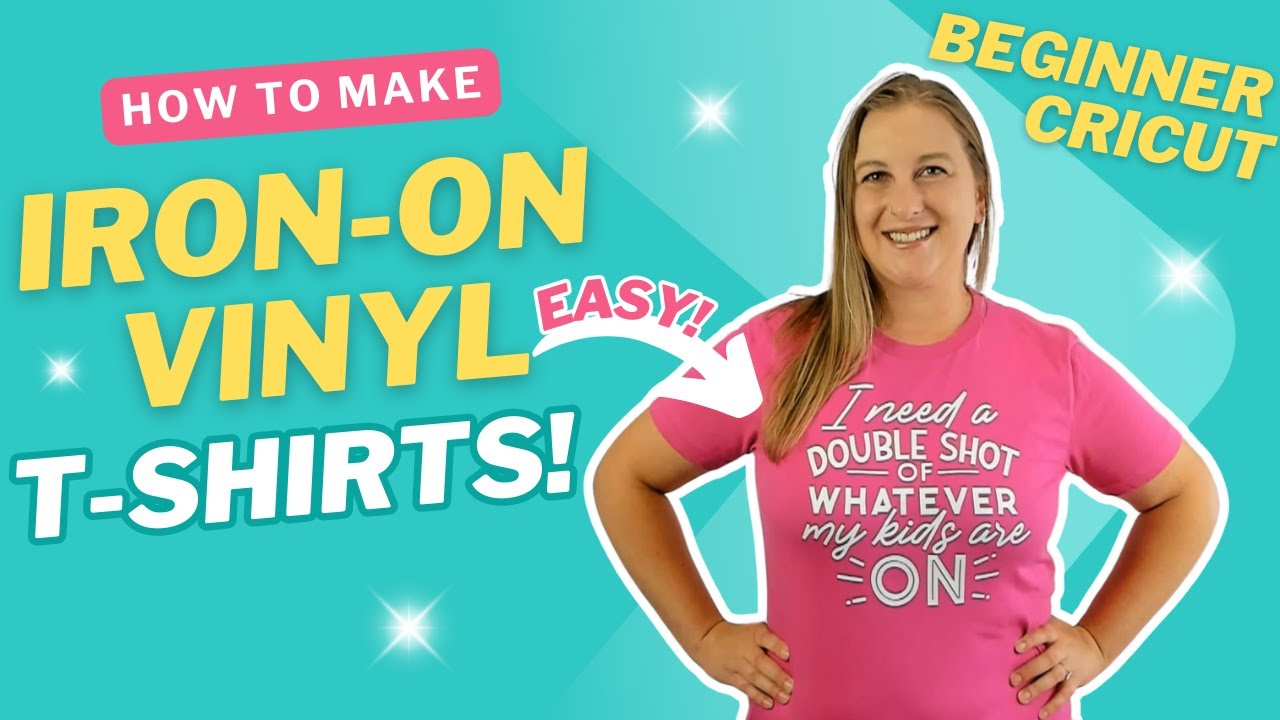
How to Make Your Own T-Shirt Designs with Cricut and HTV Vinyl
Welcome to this Cricut HTV tutorial! In this step-by-step guide, you’ll learn how to create stunning custom t-shirts using heat transfer vinyl (HTV). Whether you’re a beginner or looking to refine your skills, this tutorial will provide you with all the essential tips and techniques to get started on your first HTV project.
Table of Contents
- Step 1: Gather Your Materials
- Step 2: Open Cricut Design Space
- Step 3: Upload and Resize Your Design
- Step 4: Prepare and Cut Your Vinyl
- Step 5: Weed Your Iron-On Vinyl
- Step 6: Prepare Your Shirt for Heat Pressing
- Step 7: Apply Heat Transfer Vinyl with HTVRont Heat Press
- Step 8: Final Product Reveal
What You’ll Learn
In this tutorial, you’ll learn how to:
- Choose the right HTV for your project
- Set up your Cricut machine
- Create and apply your design with an easy step-by-step guide
- Prepare your design in Cricut Design Space
- Cut and weed your vinyl
- Apply the vinyl to your shirt
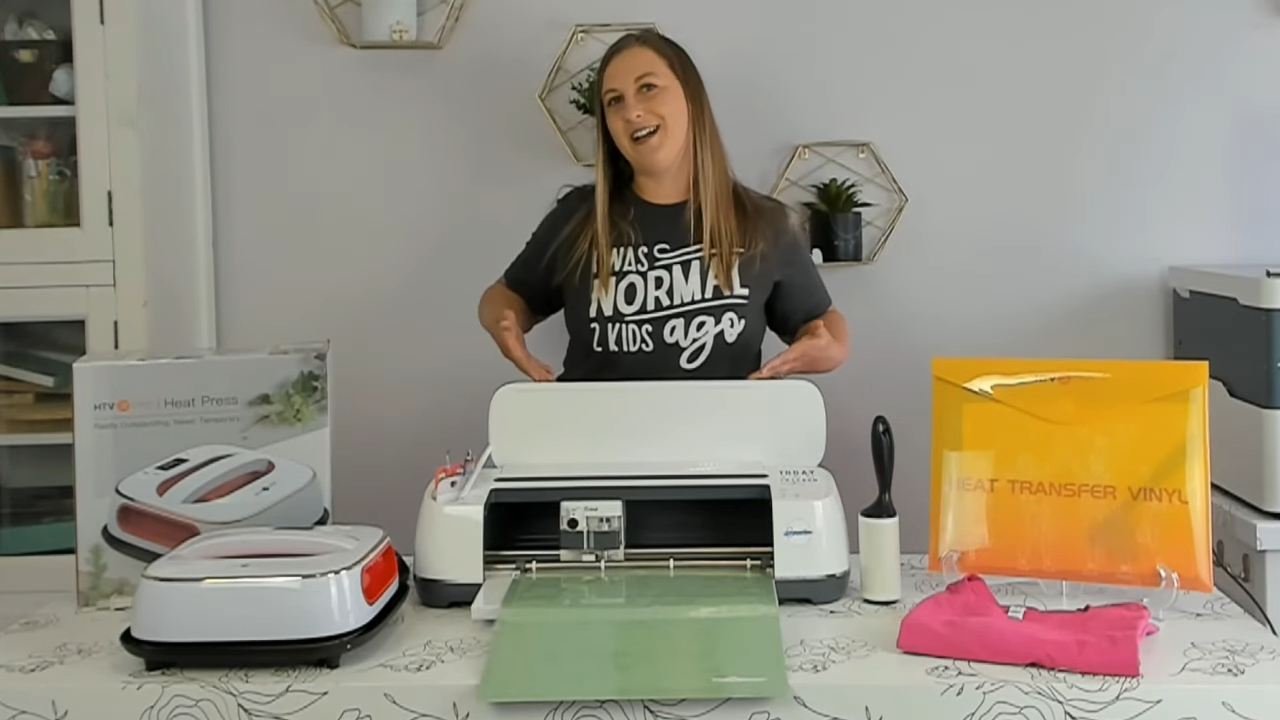
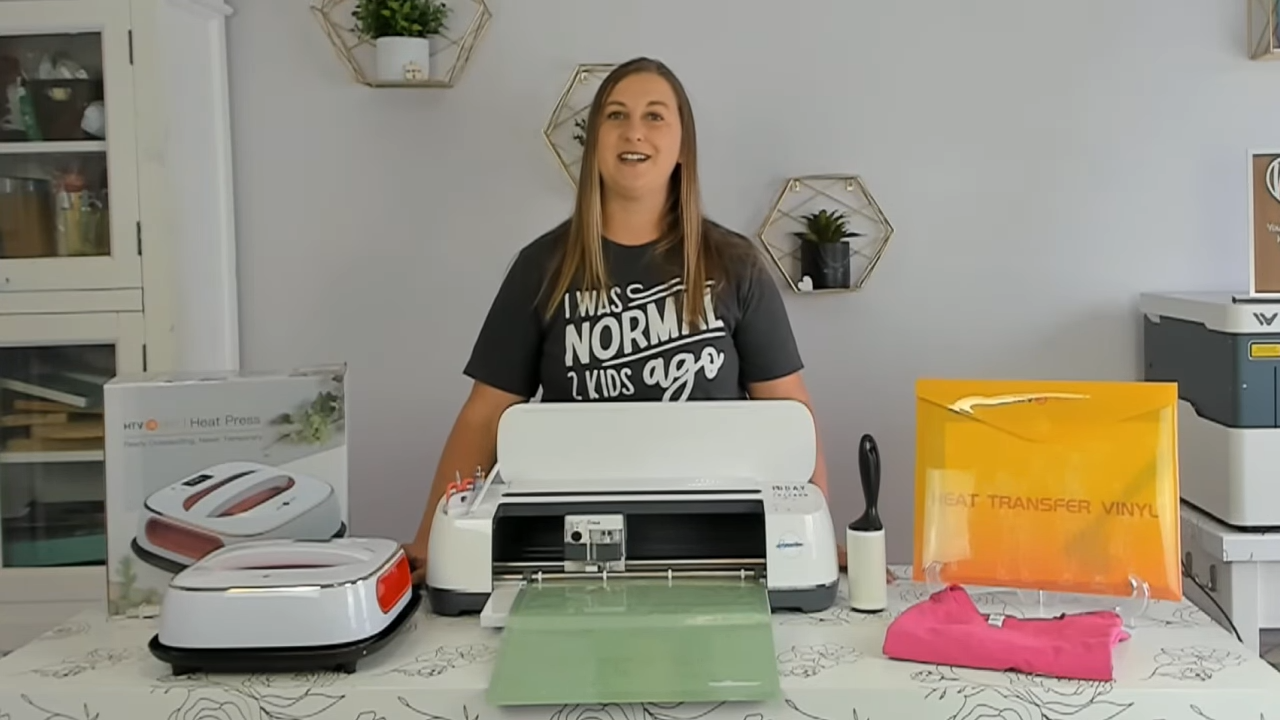
Step 1: Gather Your Materials
Before you begin your Cricut HTV tutorial, it’s essential to gather all the necessary materials. Having everything ready will make the process much smoother and more enjoyable.
One of the things you will need to work with HTV is a Heat Press Machine. Heat Presses come in all different shapes and sizes, depending on what kind of project you’re working on.
Today, I’m using a 10″ x 10″ portable heat press by HTVRont. It’s very similar to Cricut’s Easypress. I’ll also be using the HTVRont Iron On Vinyl Bundle, which comes in a pack of 42 sheets with 30 different colors to choose from.
Essential Tools
First, collect all the essential tools you’ll need for this project. Here’s a quick list of everything you’ll need. I’ll link to the materials I used in the project to make it easier for you to follow along:
- Cricut machine
- HTV (Heat Transfer Vinyl)
- Heat press machine
- T-shirt (Bella and Canvas recommended)
- Cricut Basic Tool Set
- Green standard grip mat
- Lint roller
- Teflon sheet or parchment paper
- Cricut Trimmer
- Weeding tools
- Measuring tape
Where to get your design
You’ll need a design for your t-shirt. If you’re not so great at drawing your own designs, Creative Fabrica is an excellent resource for fonts and designs.
Today, I’ll be using a design from this Sarcastic Mom Svg bundle. I have 2 kids, ages 7 and 9, and they are non stop balls of energy.
If that’s not your style, Creative Fabrica offers thousands of options suitable for any project. They have almost any design you can think of, in addition to beautiful fonts, graphics, and even an AI tool to help you create designs no one’s ever seen! Sign up for their free trial to explore their vast library.

With everything in place, you’re ready to start creating your custom t-shirt. Let’s move on to setting up your Cricut Design Space.
Download Your Design
Step 2: Open Cricut Design Space
Now that you have all your materials, it’s time to dive into Cricut Design Space. This software is essential for creating and customizing your designs before cutting them on your Cricut machine.
Setting Up Your Design Space
First, open Cricut Design Space on your computer or mobile device. If you haven’t already, create an account and log in. This will allow you to save your projects and access them from any device.
Step 3: Upload and Resize Your Design
Uploading Your Design
Click on the “New Project” button to start a new design. To upload a design, select the “Upload” button on the left-hand side. Then, click “Upload Images” and “Browse” to find the file you want to use from your computer. Then click open.
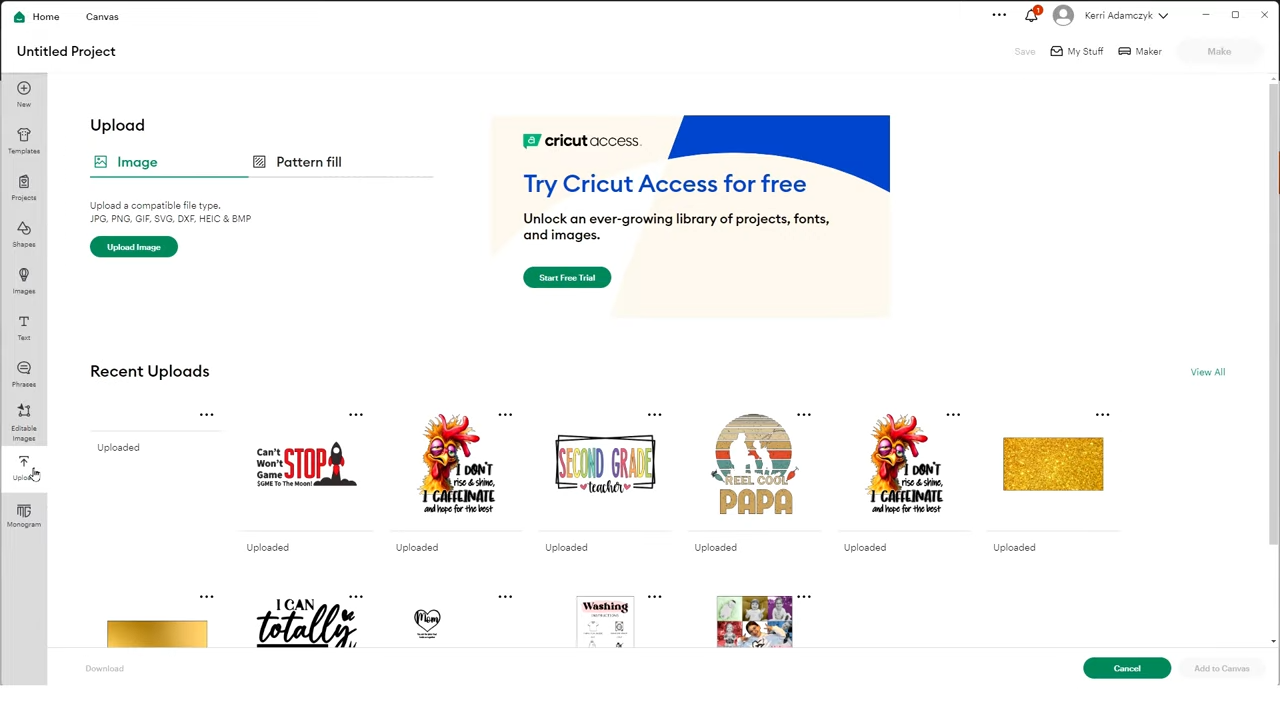
Resizing and Positioning
Once your design is uploaded, click on it to add it to your canvas. Use the handles on the corners to resize the design to fit your t-shirt. There are 2 ways to make sure your design is the correct size. You can use a template, or you can measure your t-shirt to get the correct size.
Using Templates
You can use google to find templates for your design. Templates help you visualize your design on different items. Once you know what size you need, you can either use the handles on the corners of the image, or type in the size in the tool bar above the canvas.
Cricut Design Space also has a template feature that lets you preview how your design will look. Click on “Templates” and choose “Classic T_Shirt.” You can change the color of the shirt and the vinyl to see what your design will look like.
Once you’re ready, you can click the Make It Buton!
Welding and Uniting
Sometimes, once you click Make It, your design will look all jumbled on the preview page. If your design has multiple parts, use the “Weld” or “Unite” functions to combine them into one piece. This ensures that all parts of your design stay together when cutting.
Hit “Cancel, then highlight all of your design, then press “Combine” and then either “Weld” or “Unite.” They both do the same thing, except welding is permanent.
With your design ready, you’re all set to cut your vinyl. In the next step, we’ll go over how to load your vinyl and cut it using your Cricut machine.
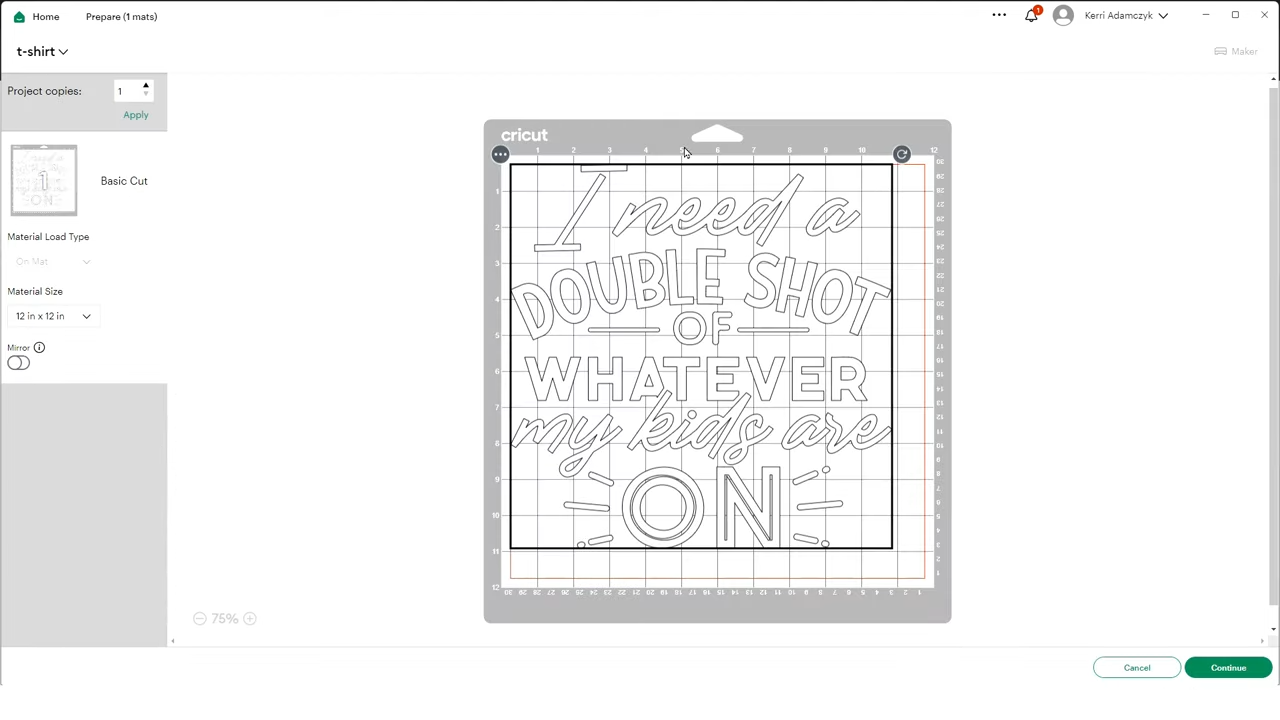
Step 4: Prepare and Cut Your Vinyl
Now that your design is ready, it’s time to prepare and cut your vinyl. This step is crucial to ensure your design transfers perfectly onto your t-shirt.
Choosing the Right Vinyl Color
First, decide on the vinyl color. You can preview how different colors look on your t-shirt by using Cricut Design Space templates. Simple colors like black or white often look best.
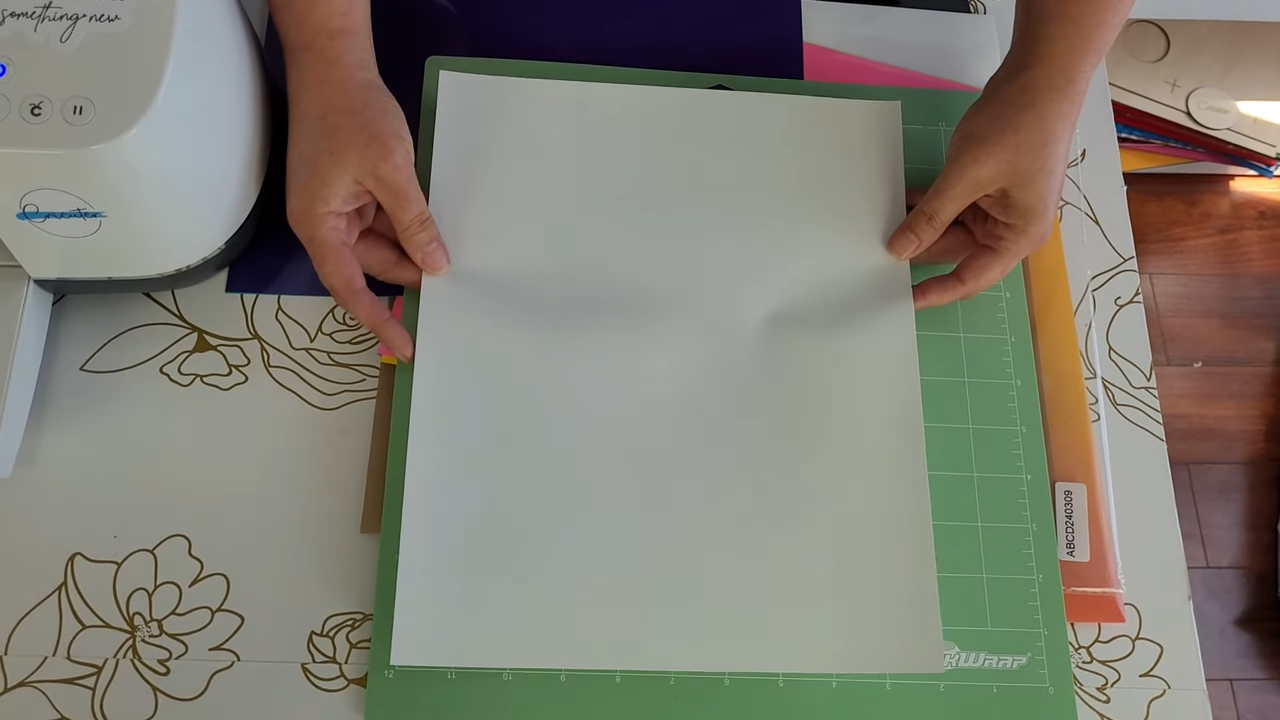
Setting Up Your Mat
Next, ensure your cutting mat is the right size for your project. Typically, a 12 x 12 inch mat works well, but for larger designs, a 12 x 24 inch mat may be needed.
Mirroring Your Design
Before cutting, always mirror your design. This step is essential for heat transfer vinyl (HTV) as it ensures the design is correctly oriented when applied to the shirt. If you don’t do this, your design will be backwards on the shirt
Cutting the Vinyl
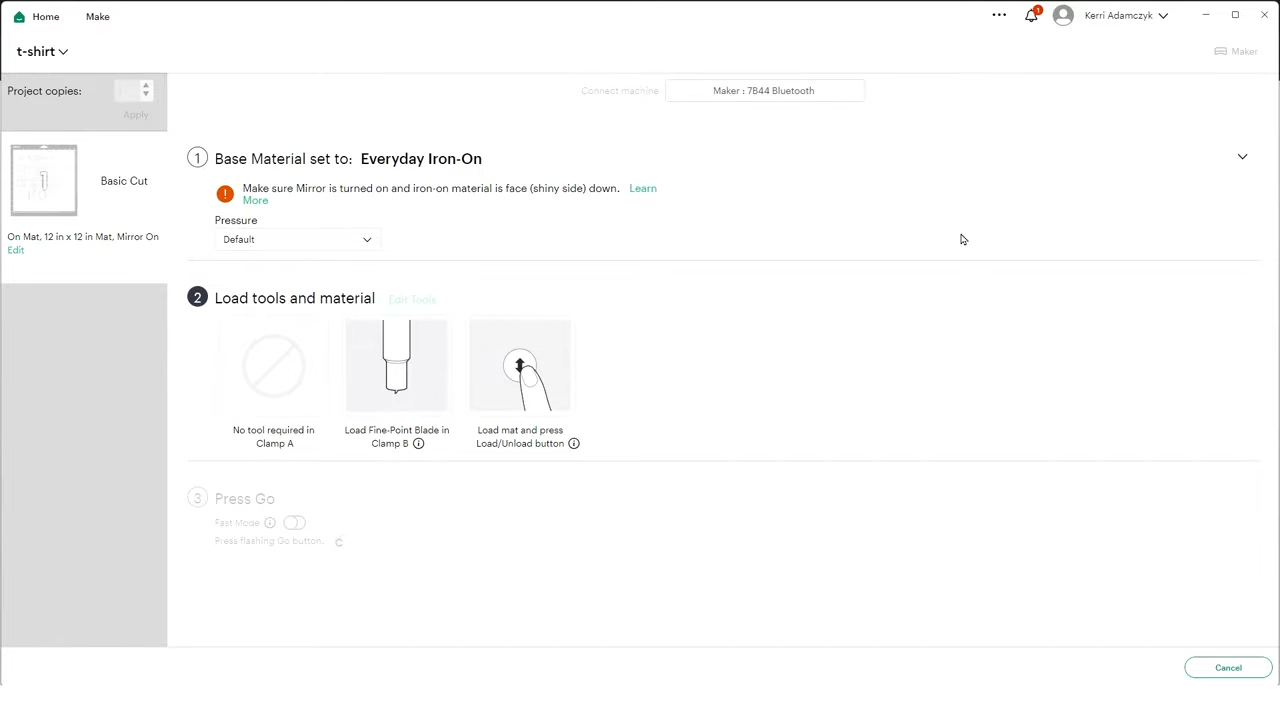
After mirroring, Click continue. Make sure your machine is plugged in and turned on. Next select your base material. With the Maker, select the material on the screen. If you’re iusing a machine with a dial like the Explore Air 2, you select it right on the machine. Select Every Day Iron On as your material.
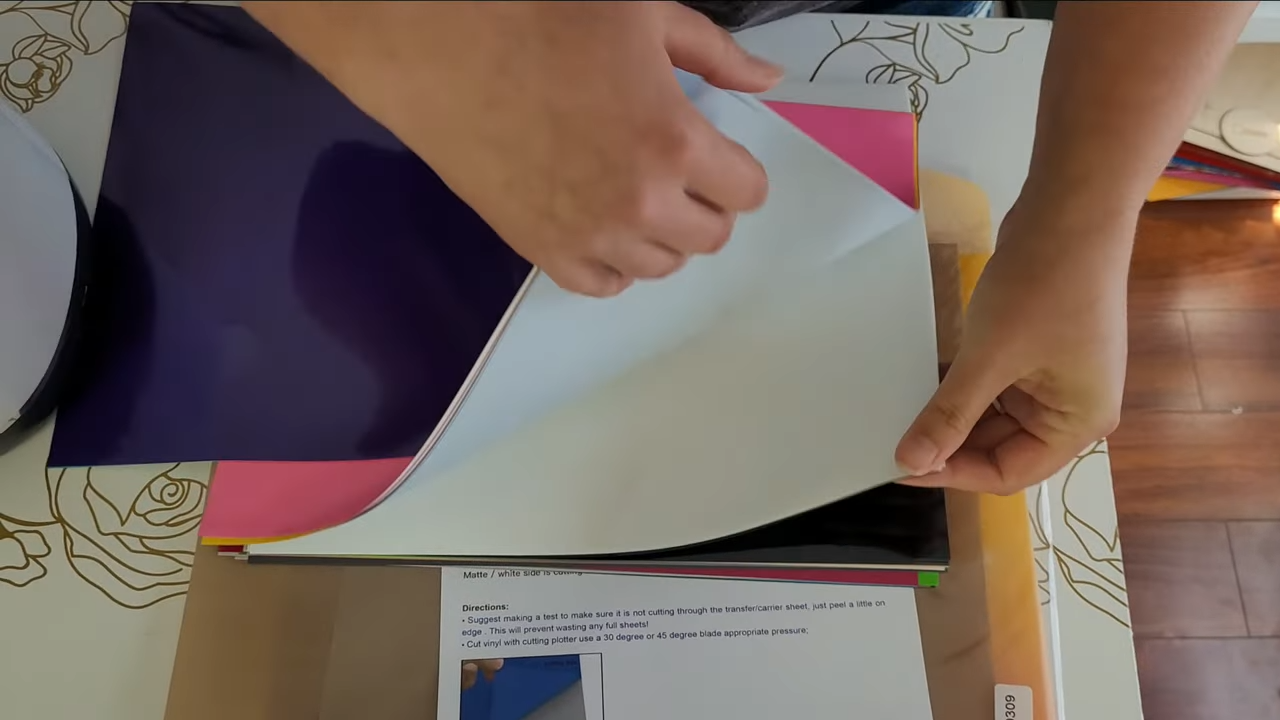
Now, take your vinyl and you will notice that one side is shiny and one side is not. You will need to load the vinyl onto the mat with the shiny side down.
Cut a piece of vinyl to the right size for your shirt. Place it in the upper left corner of your mat.
Finalizing the Cut
Once everything is set, click “Continue” in Cricut Design Space. Ensure your machine is connected via USB or Bluetooth. Then press the button on your machine to load the mat into the machine. Then click the blinking Cricut button to start cutting. Your Cricut will begin cutting your mirrored design onto the vinyl.
With your vinyl cut, you’re ready to move on to the next step: weeding your design. This will prepare it for application to your t-shirt.
Step 5: Weed Your Iron-On Vinyl
Now that your vinyl is cut, it’s time to weed your design. Weeding is the process of removing the excess vinyl, leaving only your design.
Gather Your Tools
First, you’ll need a few tools to make this process easier. A weeding tool is essential, but you can also use tweezers or a craft knife.
- Weeding tool
- Tweezers
- Craft knife
Start from the Edge
Begin weeding from the edge of your design. Carefully lift a corner of the vinyl and slowly peel it back.
Take your time to avoid tearing any part of your design.
Work in Sections
Weed your design in small sections. This helps you maintain control and ensures you don’t accidentally remove any part of your design.
If you encounter small, intricate details, use your weeding tool to carefully remove them.
Check for Leftover Pieces
After weeding the main sections, inspect your design for any leftover vinyl pieces. These small bits can affect the final result.
Use your weeding tool or tweezers to remove any tiny pieces.
Final Touches
Once you’ve weeded all the excess vinyl, give your design a final check. Ensure all unwanted vinyl is removed and your design is clean.
Now, your vinyl is ready to be transferred to your t-shirt.
With your design weeded and ready, you can proceed to the next step: preparing your shirt. This ensures a smooth and professional application of your design.
Step 6: Prepare Your Shirt for Heat Pressing
Before applying your design, it’s crucial to prepare your shirt properly. This step ensures that the vinyl adheres smoothly and lasts longer.
Remove any stickers
Take off any stickers or tags that will get in the way of your design.
Use a Lint Roller
Remove any lint or debris from the shirt using a lint roller. You can also use tape if you don’t have a lint roller. This step is essential for a clean application.
With your shirt prepped and ready, you’re set to move on to the heat pressing stage. This final step will bring your custom design to life!
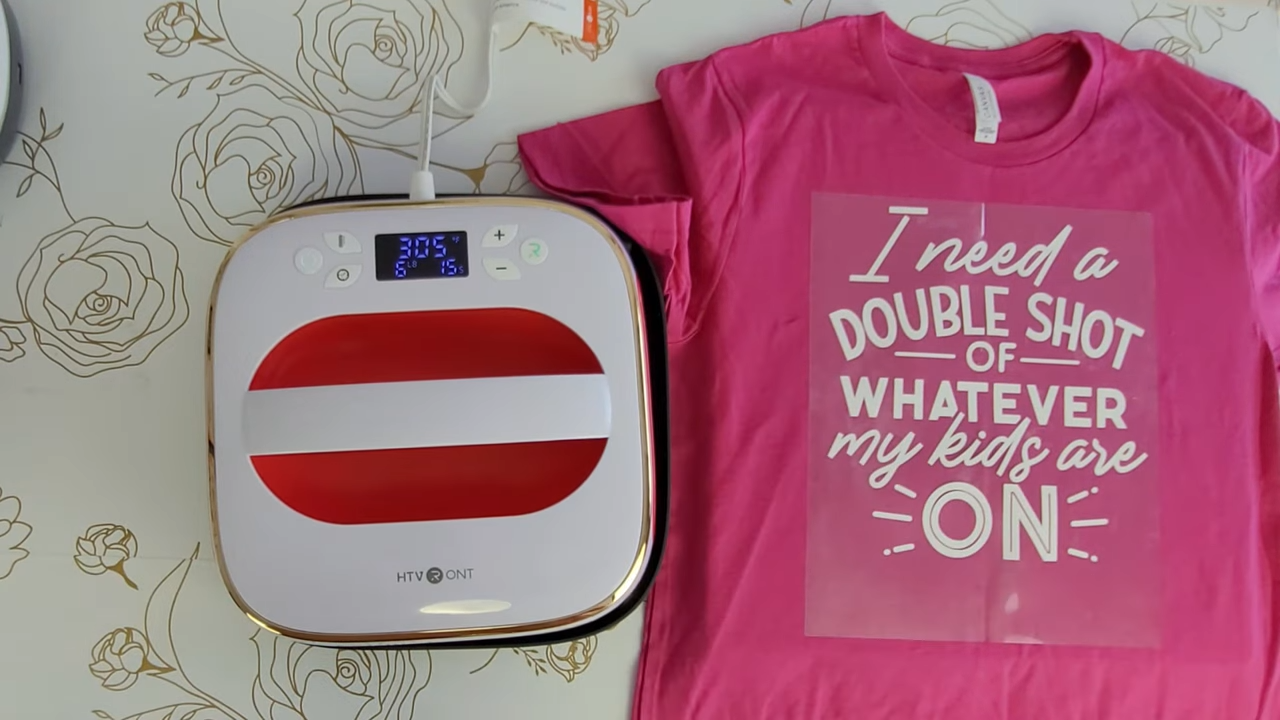
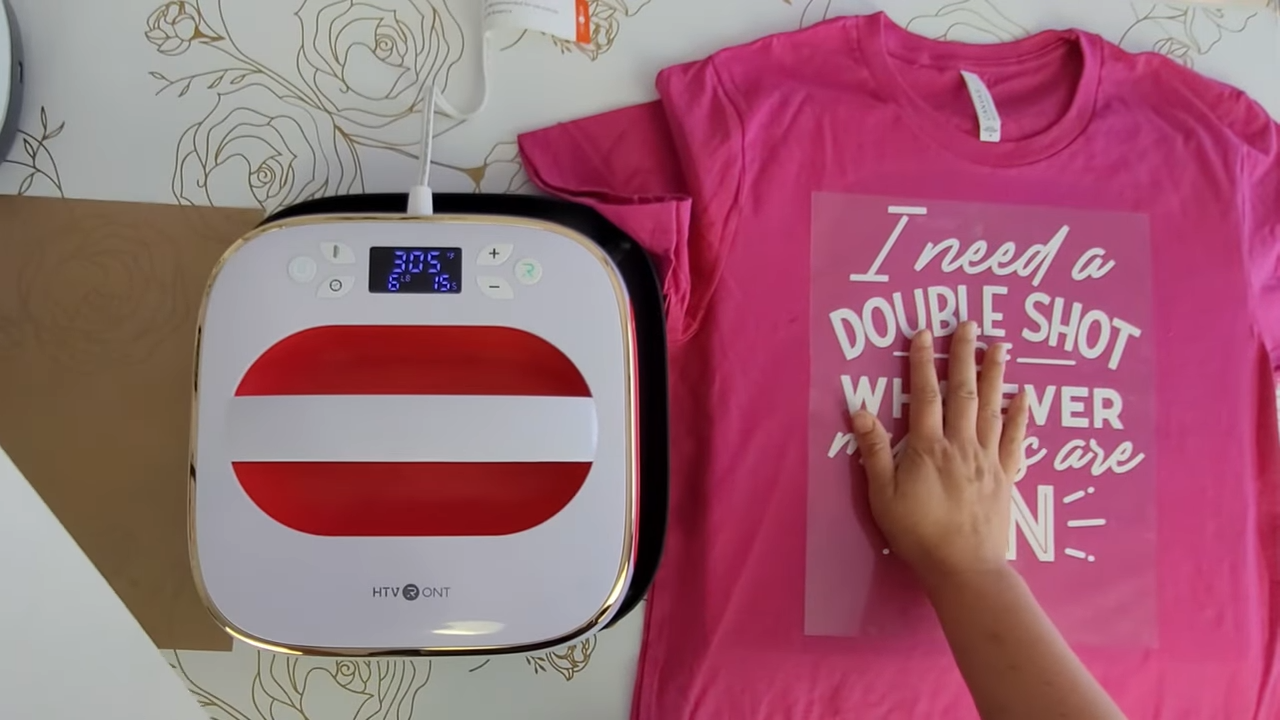
Step 7: Apply Heat Transfer Vinyl with HTVRont Heat Press
Applying heat transfer vinyl (HTV) is the final step in creating your custom t-shirt. Here’s how to do it effectively using the HTVRont Heat Press.
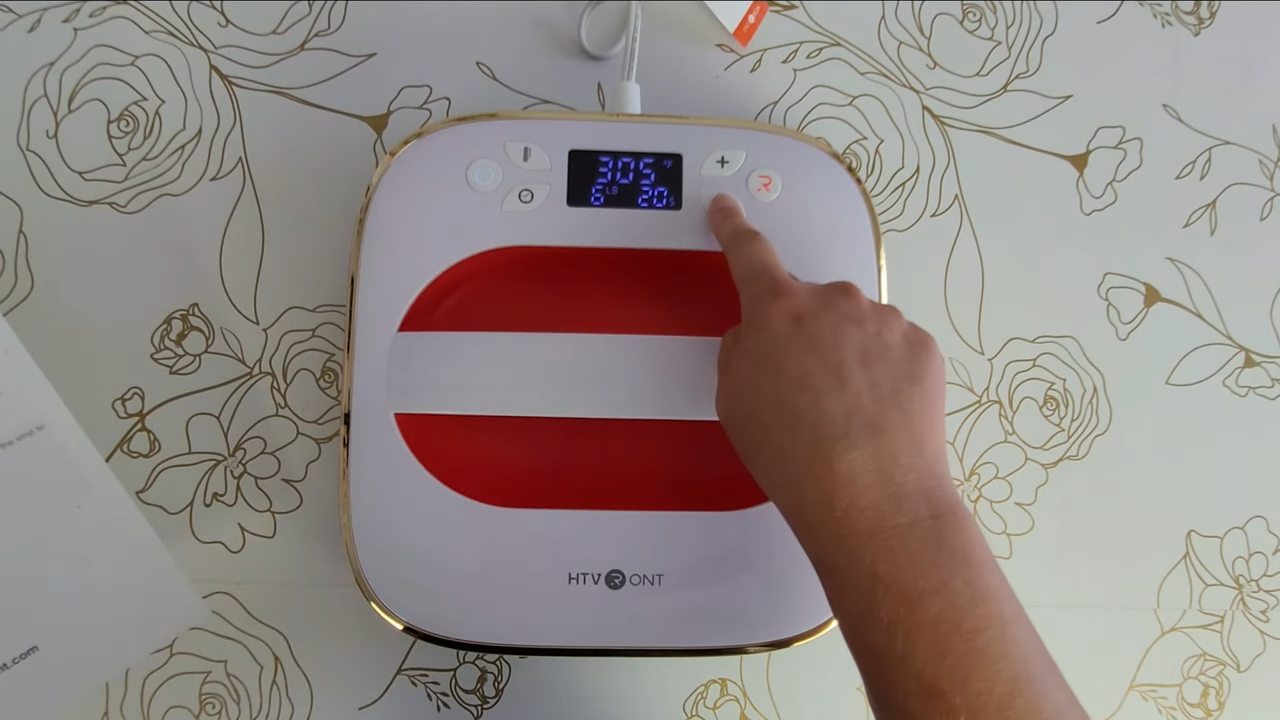
Set Up Your Heat Press
Begin by plugging in your HTVRont Heat Press and setting it to 305°F. Adjust the timer to 15 seconds.
It’s important to let the press reach the desired temperature before you start.
Pre-Press Your Shirt
Pre-press your shirt for 2-3 seconds to remove any wrinkles and moisture. This step ensures a smooth surface for your HTV.
Simply press down and hold the start button on your heat press.
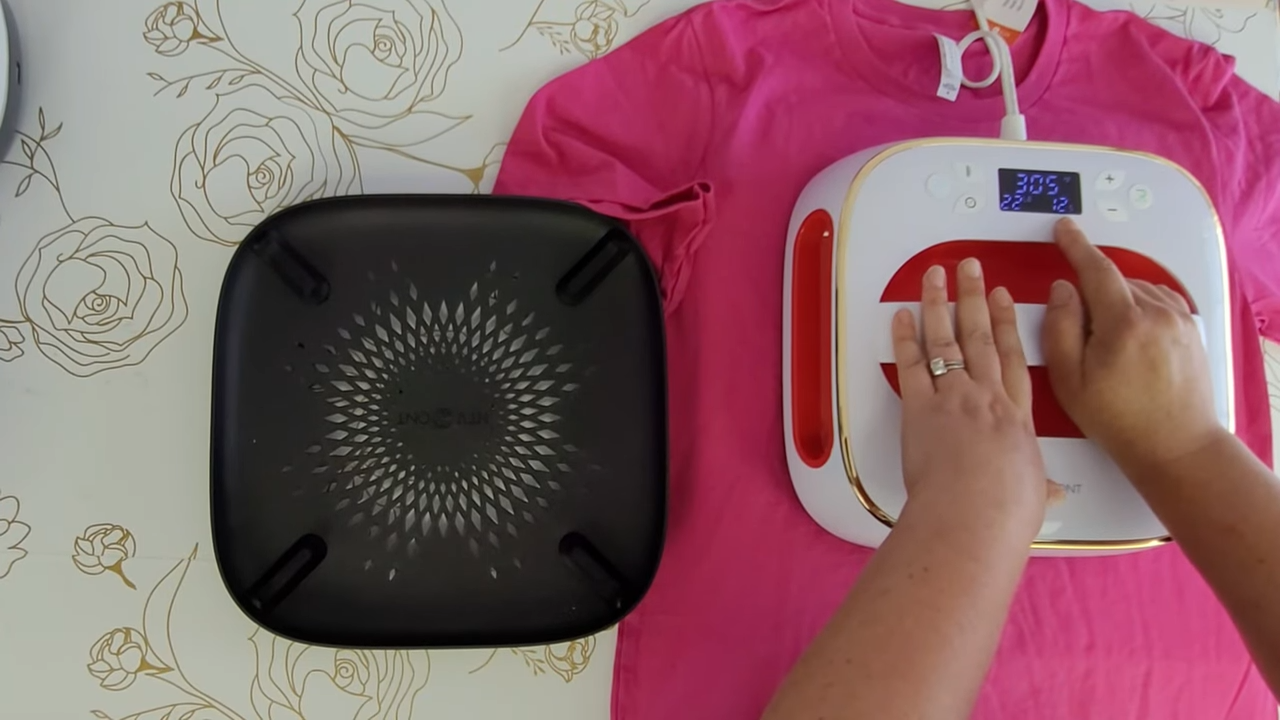
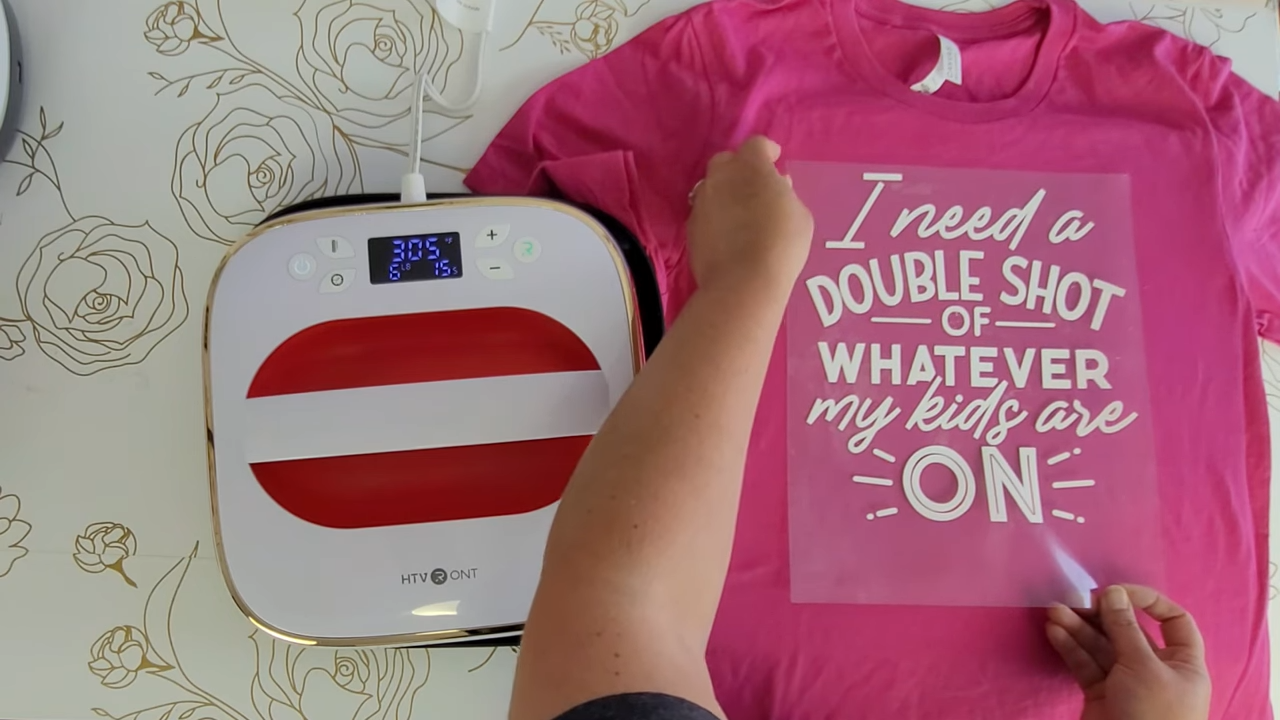
Position Your Design
Place your t-shirt on a heat-resistant mat or folded towel to protect your table. Center your design about 3 inches below the neckline.
Use a ruler or the fold-and-crease method to ensure perfect alignment.
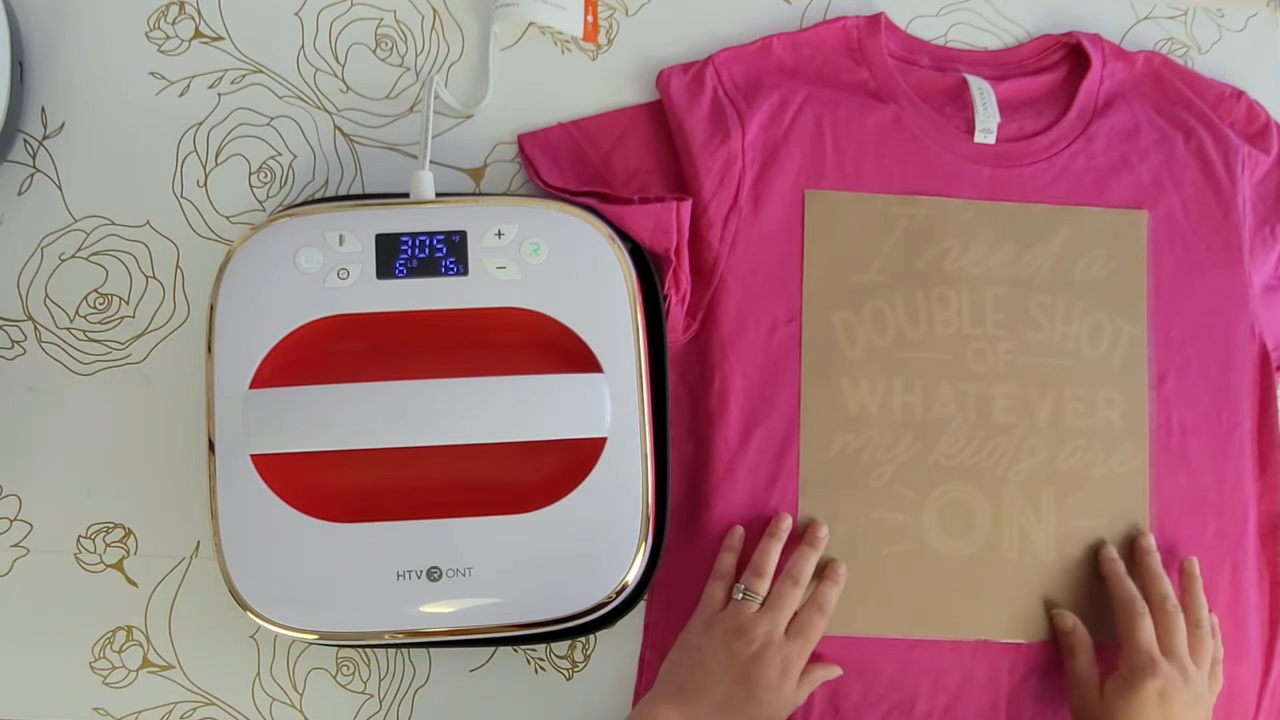
Apply the HTV
Place a Teflon sheet over your design to protect it. Press down firmly with your heat press and start the timer.
For larger designs, you may need to press in sections to cover the entire area.
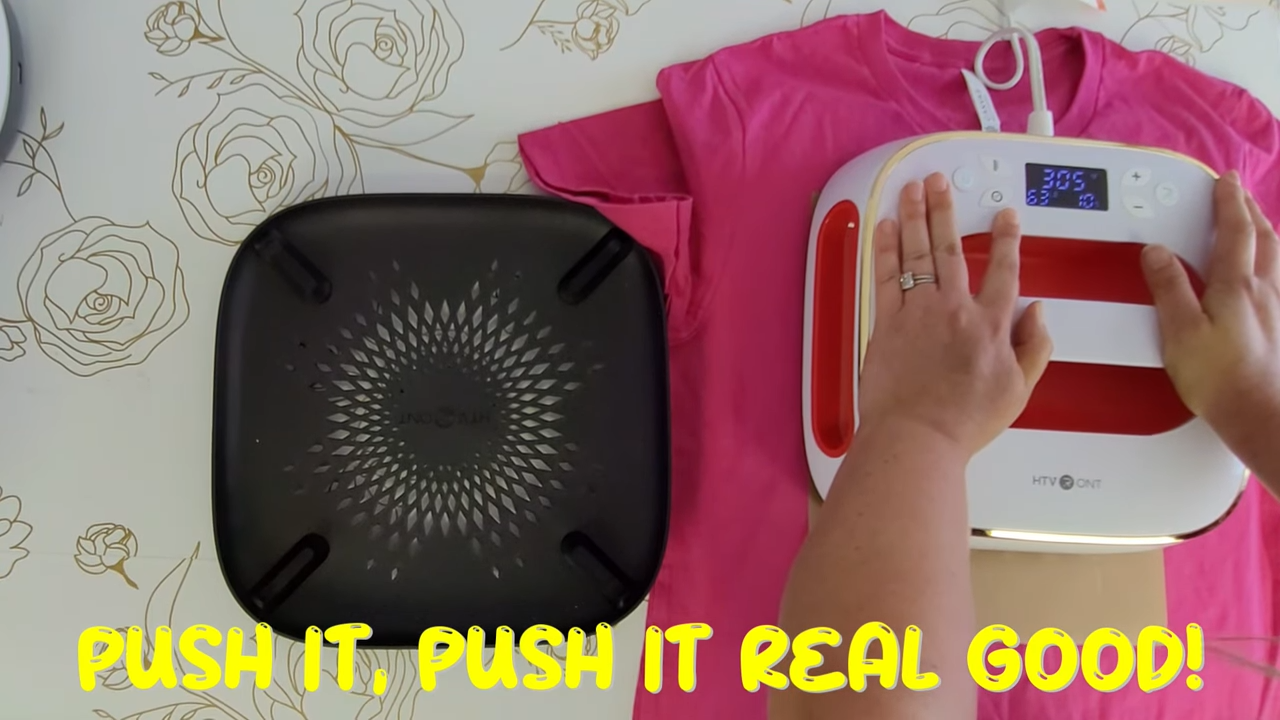
Check Your Pressure
The HTVRont Heat Press shows how much pressure you’re applying. Adjust your pressure as needed to ensure even application.
More pressure results in a better bond between the vinyl and the shirt.
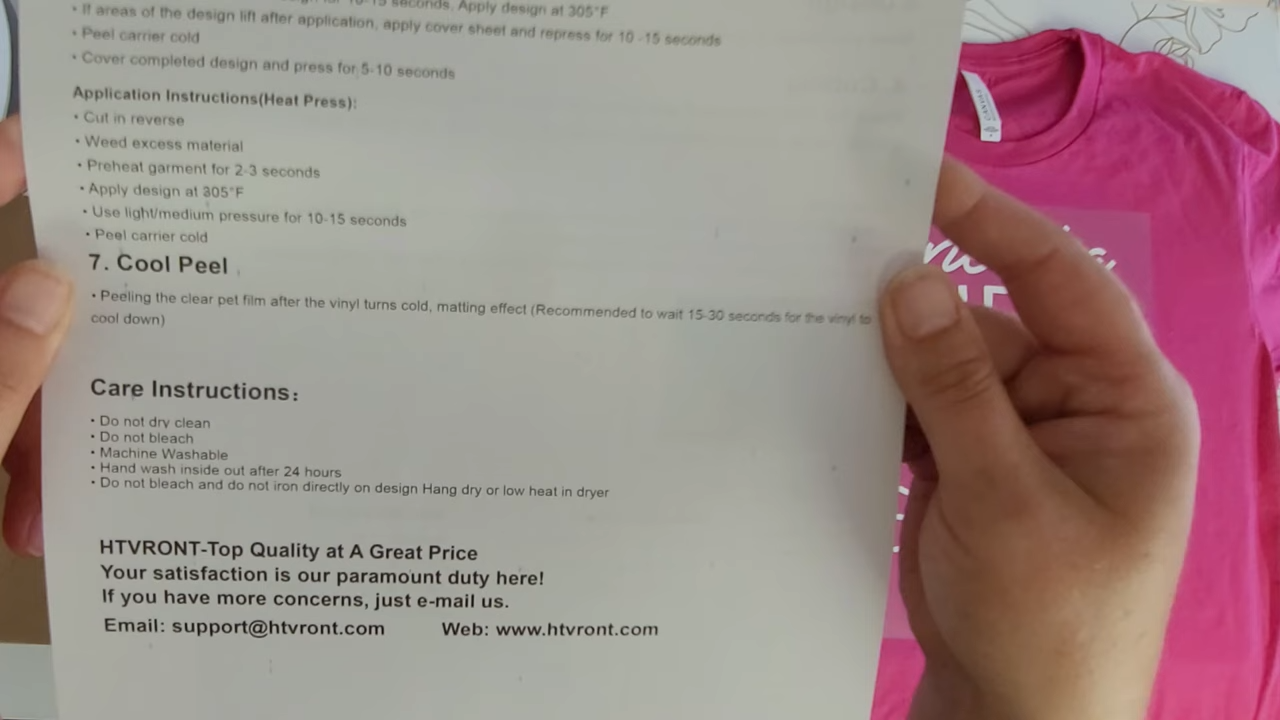
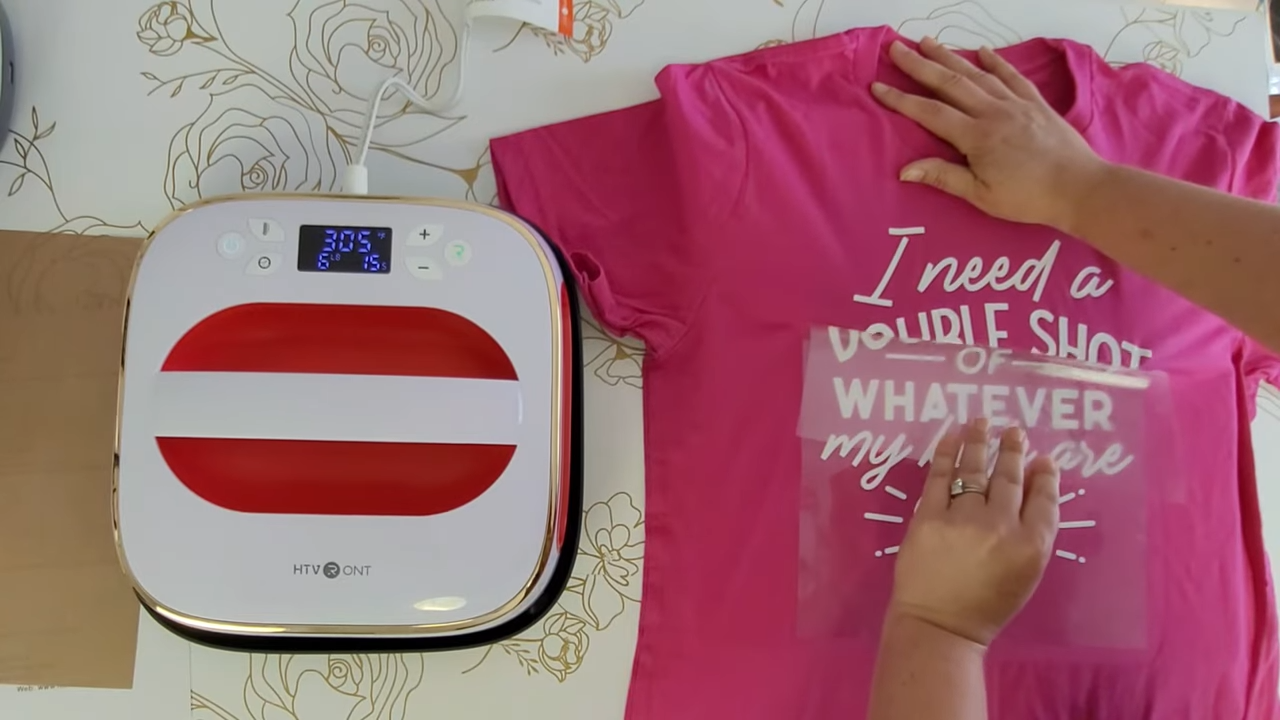
Cool and Peel
Wait for the vinyl to cool down, typically 15-30 seconds, but it may take longer. This is crucial for a successful transfer.
Carefully peel off the carrier sheet once the vinyl is cool to the touch.
Final Check
Ensure the vinyl has adhered properly. If any part is lifting, press again for a few more seconds.
Double-check all areas to make sure your design is fully attached.
Congratulations! You’ve successfully applied your HTV using the HTVRont Heat Press. Your custom t-shirt is now ready to wear and enjoy.
Step 8: Final Product Reveal
It’s time to unveil the final product! After all the hard work, your custom t-shirt is ready to wear and show off.
Peel Off the Carrier Sheet
Carefully peel off the carrier sheet to reveal your design. Apply firm pressure to ensure the vinyl adheres well.
Inspect Your Shirt
Check your shirt for any color changes due to the heat press. Don’t worry, these changes will fade as the shirt cools.

Try It On
Once the shirt is cool, try it on! Admire your work and enjoy your new custom t-shirt.

Share Your Creations
Show off your new shirt to friends and family. You’re now ready to create more custom clothing right at home.

We hope you enjoyed this Cricut HTV tutorial. Feel free to leave any questions or comments below and happy crafting!
Cricuter’s Recommended Deals
- Sign up for Creative Fabrica’s FREE trial
- Sign up for Creative Fabrica’s discounted yearly subscription
- Shop the best deals on Cricut machines
- Accept credit card payments with your FREE Square Card Reader
- Check out my Linktree
Connect with Cricuter
Some of the links provided are affiliate links. Cricuter is a participant in the Amazon Services LLC Associates Program, an affiliate advertising program. As an Amazon Associate, we earn from qualifying purchases. This means, at no additional cost to you, we will earn a commission if you click through and make a purchase.