How To Cut Basswood With The WeCreat Vista: A Beginner’s Guide
If you just got a new WeCreat Vista and want to learn how to use it, you’ve come to the right place. Today I’m going to teach you a very basic but absolutely necessary skill to know how to do – how to cut basswood with the WeCreat Vista.
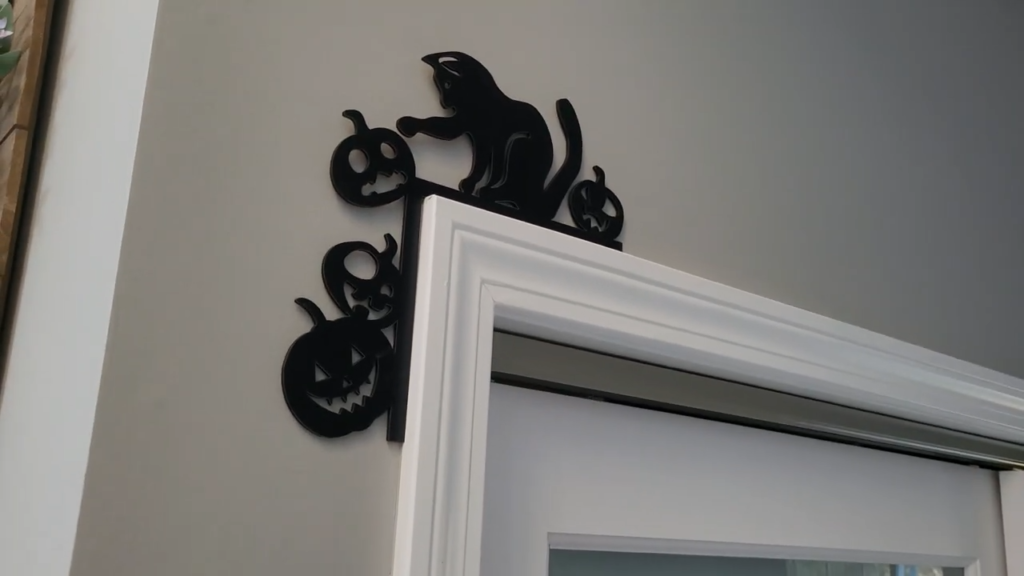
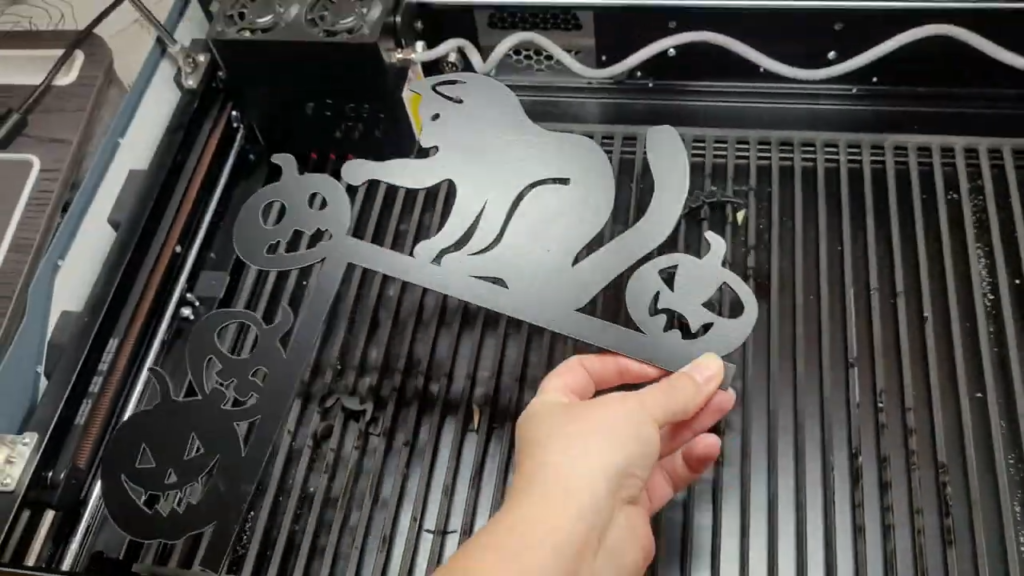
For this project, we’re using 3mm basswood to create a Halloween door corner decoration featuring a playful cat and pumpkins. Not only is this project cute and festive, but it’s also simple enough to give you hands-on experience cutting thin wood with your WeCreat Vista.
You’ll also learn some important WeCreat MakeIt Software skills like how to import a design, how to resize and flip your designs, how to auto focus your camera and so much more.
We’re also going to do some speed tests, seeing just how fast we can cut on this machine while still getting great results. I’m going put a stopwatch on and compare their estimated cut times to actual cut times to find out how long it actually takes to complete this project.
Getting Started with the WeCreate Vista
If you’re new here, welcome!. My name is Kerri. I share all kinds of craft tutorials on my channel.
My channel name is Cricuter because I started off with a Cricut machine, but over the years have branched out into other crafts like sublimation and laser engraving.
I’ve got a little bit of everything for everyone; How to make shirts, stickers, car decals, personalized stuffed animals, laser engraved cutting boards, laser cut acrylic jewelry, so much stuff.
‘If you just got a brand new We Create Vista, you’ve come to the right place.’
Our Halloween Project: A Cat and Pumpkins
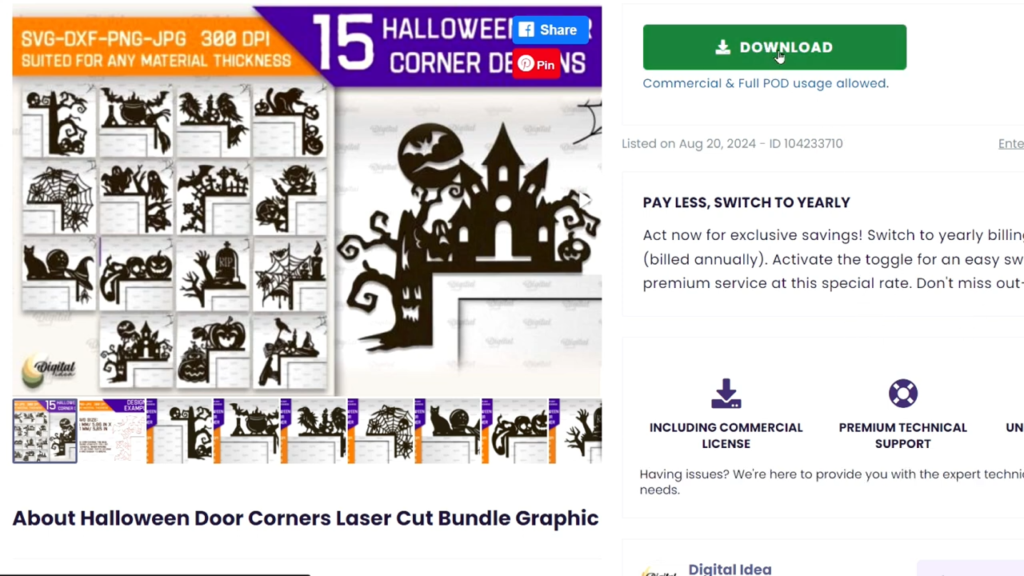
Today, we’re gearing up for a festive Halloween project. We’ll be learning how to cut basswood by creating a lovely door corner decoration featuring a cute cat and some cheerful pumpkins. Who doesn’t love a little spookiness mixed with charm? It’s a great way to get into the holiday spirit while honing your crafting skills.
Why Hands-On Experience with Cutting Basswood is Key
Now, let’s talk about basswood. This material is *perfect* for beginners.
Why?
- Easy to Cut: Unlike tougher woods, basswood is lightweight and manageable.
- Detail Work: With its fine grain, it allows for clean cuts.
So, if you’re new to laser cutting and engraving, understanding the basics of how to cut basswood sheets is essential.
What is basswood, anyways? Basswood is a type of lightweight, soft wood known for its fine grain and smooth surface. It’s easy to work with, especially for beginners, because it produces clean cuts and detailed engravings with minimal burning.
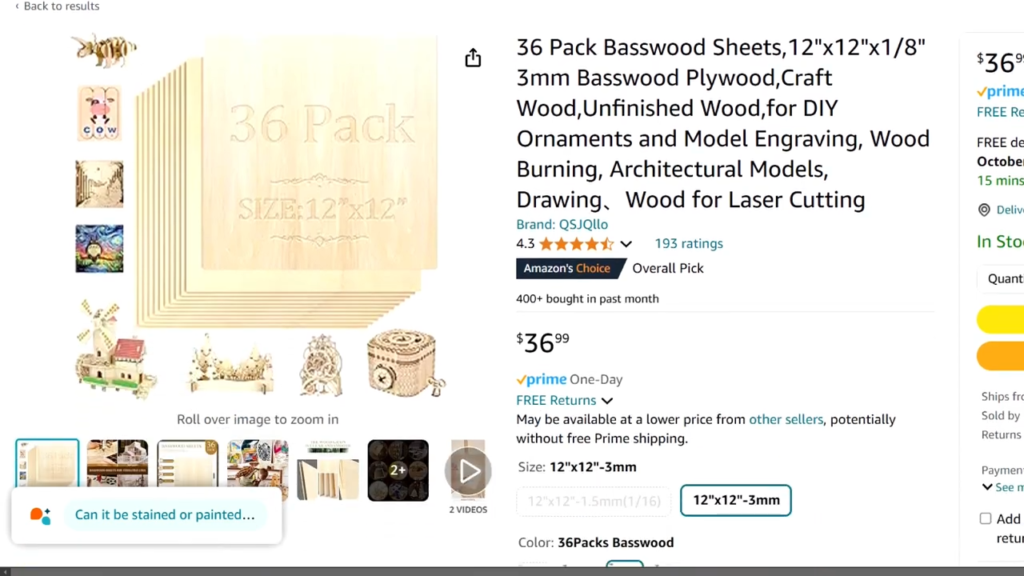
Crafters cut basswood sheets to make all kinds of cool laser cut projects. You can laser cut custom signs, picture frames, jewelry, wall art, or my personal favorite, Christmas ornaments.
Once you master this simple skill, the possibilities are endless!
Materials and Tools You’ll Need
First things first, let’s go over the materials you’ll need to complete this project Here’s what you’ll need:
- Three millimeter basswood sheets (I’ve got the preprinted kind—so easy!).
- Your WeCreate Vista machine.
- A booster fan for proper ventilation.
- Chalk for outlining designs.
- SVG files for your designs (I found mine on Creative Fabrica).
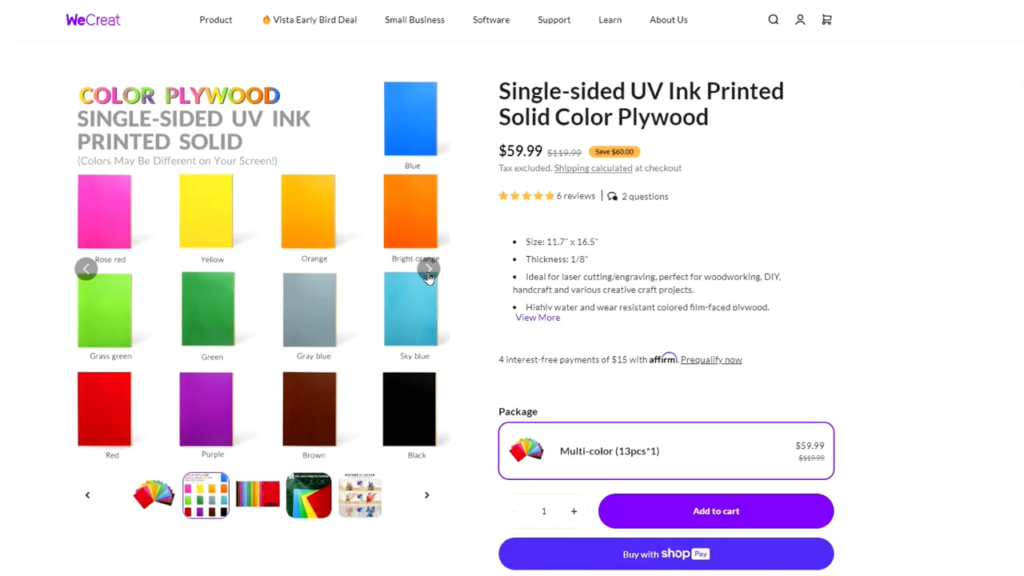
This wood came pre-printed from WeCreat’s website. It’s Single-sided UV Ink Printed Solid Color Plywood and it’s so convenient having a variety of colors on hand. These basswood sheets are a lot bigger than most, they measure 11.7″ x 16.5″. And they’re also 50% off right now. I really love their pre-printed wood because I hate painting.
I’ve got the WeCreat booster fan hooked up and venting out the window. Ventilation is important and you want to make sure you have good air flow when you cut basswood to prevent smoke build up in your craft room. Make sure your laser module is oriented so that it’s engraving from the top and not the side. This laser has a cool feature where the module flips horizontally, so just don’t forget to flip it back for flat projects like this. Now let’s move over to the computer.
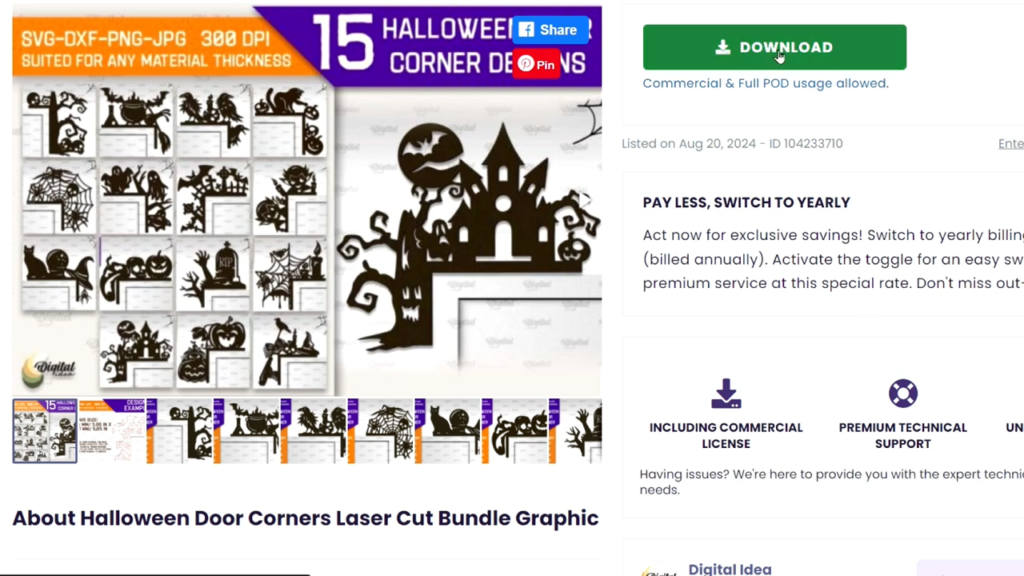
I found this Halloween door corner laser cut bundle on Creative Fabrica’s website and thought it was such a cute little project idea.
So, do you feel ready to create? Trust me, this project is designed to get you started with confidence and creativity. Let’s jump into it, and remember: it’s all about *having fun*!
Getting Design Resources from Creative Fabrica
Wondering where to find designs? Creative Fabrica is an amazing resource! It has tons of templates that can spark your creativity. And here’s a little tip:
“If you’ve never used Creative Fabrica before, you can sign up for a free trial.”
You can explore without diving into your wallet right away!
By using these techniques, you’re setting yourself up for laser cutting success. Trust me, the journey gets a lot easier when your designs fit perfectly before hitting the cut button!
How to Use the WeCreate MakeIt Software
If you’re ready to start your laser cut basswood project with the WeCreat Vista but aren’t quite sure how to get your designs into the WeCreat MakeIt software, don’t worry! The process is simple and easy. Here’s a guide to help you import your design smoothly:
Step 1: Choose and Import Your Design
First, make sure your design is ready and saved in a compatible format. SVG files are commonly used because they are easily resizable and maintain their quality. Save your design in a location that’s easy to find, like your desktop or a specific project folder.
Look for the ‘Import’ button in the software interface, which is located in a toolbar at the bottom left side of the screen. Click on ‘Import’ to open the file navigator.
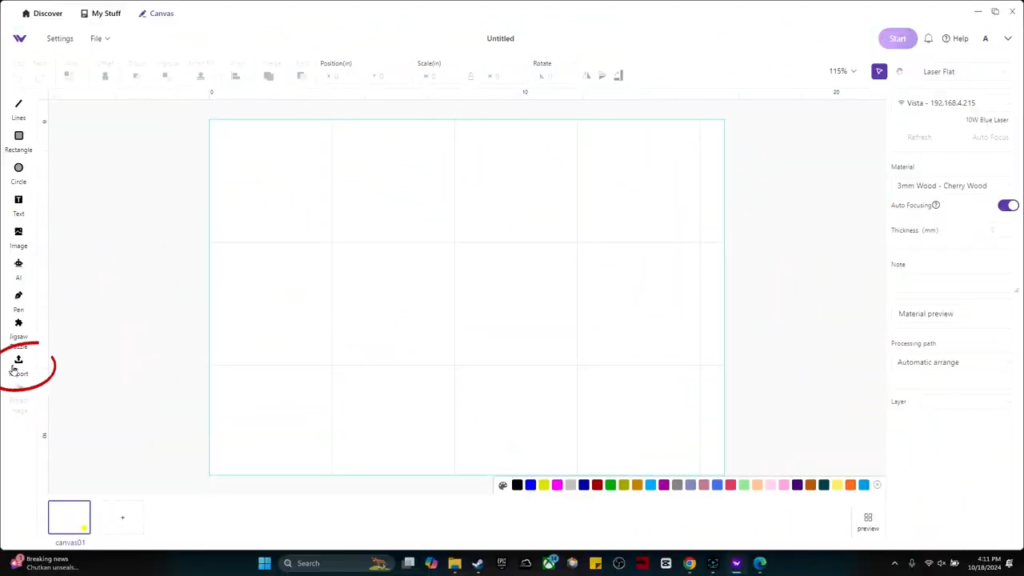
In the file navigation window, browse to the location where your design file is saved. Select the file (e.g., yourprojectname.svg) and click ‘Open.’ This action will load your design into the WeCreat MakeIt software.
2. Resizing and Flipping Designs
Once your design is imported, it’s time to get it just right for your project. Resizing can be tricky, especially if you’re trying to save material by using scraps left over from other projects.
- When resizing, remember to maintain proportions. You don’t want your design looking squished. Use the button that looks like a lock to keep the ratio locked
3. Auto-Measuring and Adjusting Settings
Who doesn’t love a machine that does the hard work for you? The WeCreat MakeIt software makes this easy with its Auto Measure feature, which automatically adjusts the laser focus based on the thickness of the material you are using.
Here’s how to use the Auto Measure feature effectively:
Step 1: Place Your Material
Before you begin, place your material, such as 3mm Basswood, on the laser bed inside your WeCreat Vista. Make sure the material is flat and correctly positioned according to your project requirements.
Step 2: Access the Auto Measure Feature
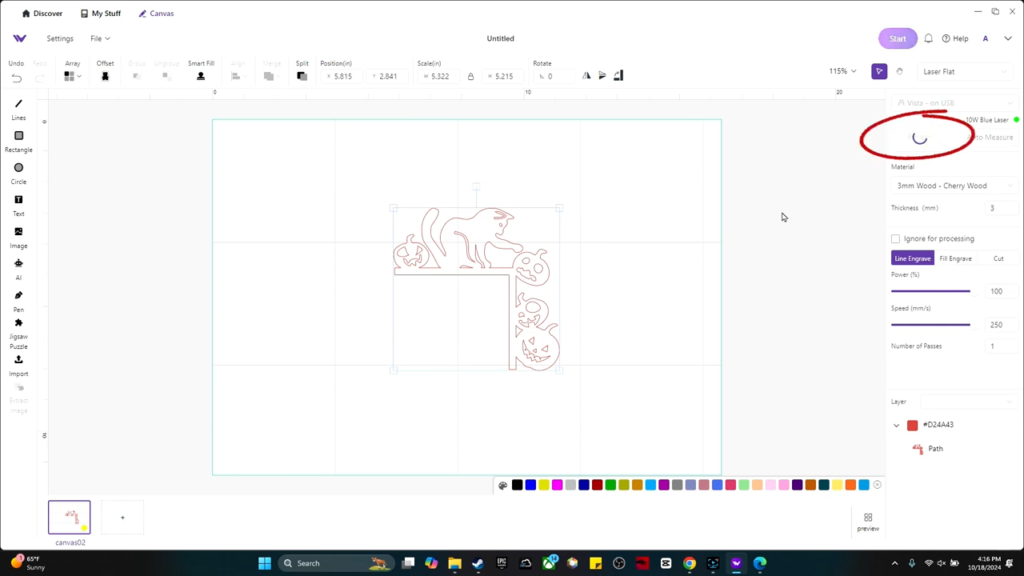
Once your material is in place, locate the Auto Measure button in the WeCreat MakeIt software interface. This button is on the right toolbar along with other setting options.
Step 3: Perform Auto Measure
Click on the Auto Measure button. The software will initiate a process where the built-in camera scans the material. This scan helps the software determine the exact thickness of your material and adjusts the focus of the laser for you.
Choosing the Right Material Settings from the WeCreat MakeIt Software Library
To make sure your laser cutting or engraving project turns out perfectly, it’s importain to select the correct material settings in your WeCreat MakeIt software. This software comes with a comprehensive library of preset material settings that simplify the setup process and help achieve the best results. Here’s how to choose the right settings for your project:
Step 1: Access the Material Settings Library
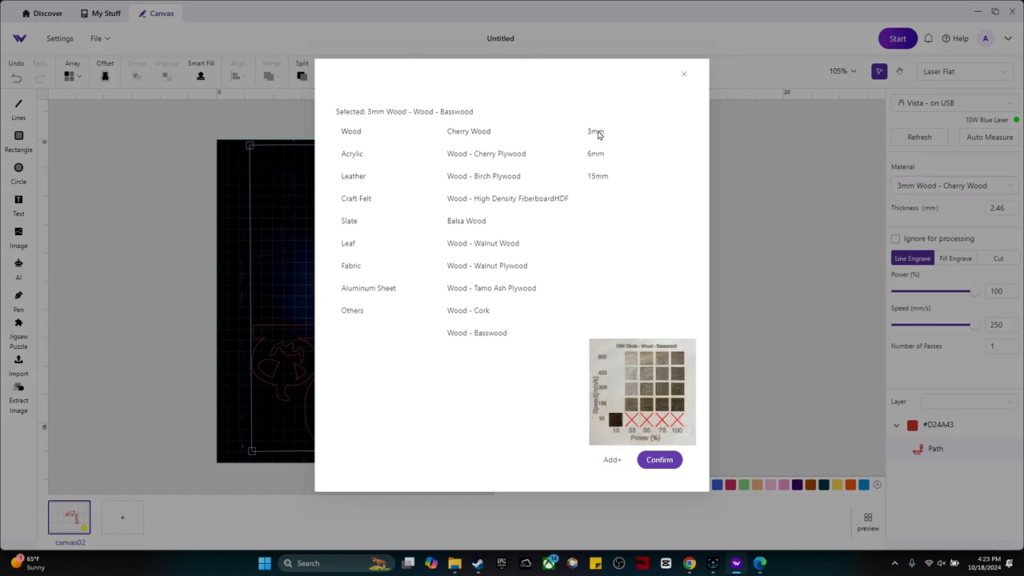
After importing your design and placing your material in the WeCreat Vista, go to the material settings section in the WeCreat MakeIt software. This is typically found on the right side of the screen.
Step 2: Select Your Material Type
Browse through the list of materials available in the library. Each material type, such as Basswood, acrylic, or leather, has pre-configured settings that are suggestedd for cutting or engraving with the WeCreat Vista. For instance, if you’re working with 3mm Basswood, look for this specific option in the list under wood> basswood > 3mm.
Step 3: Review and Adjust the Preset Settings
Once you select your material, the software will display the recommended settings for cutting or engraving. These settings include power, speed, and the number of passes. While these presets are a great starting point, depending on your project’s specific needs or the exact characteristics of your material, you might need to make slight adjustments.
Step 4: Confirm and Apply Settings
After you are satisfied with the settings, confirm and apply them to your project. These settings will dictate how the laser interacts with the material, affecting the quality and precision of the final output.
Step 6: Start Your Project
With the material settings configured, you’re ready to proceed. Ensure that everything is set up correctly, then start the cutting or engraving process. Monitoring the initial stages of the process to ensure the material responds well to the chosen settings is good practice. Your first laser cut basswood project is ready to go!
The Art of Cutting: Speed Tests and Adjustments
The project looks perfect. But how long did it take to complete? The software estimated it would take 28 minutes and 22 seconds, but it actually finished in 26 minutes and 14 seconds—only off by about 2 minutes!
| Cut Time Type | Time (minutes) |
|---|---|
| Estimated Cut Time | 28 |
| Actual Cut Time | 26 |
However, I felt like 26 minutes was an awfully long time for a laser cut basswood project like this, so I decided to do some speed tests to see how fast I could crank up the speed while still getting good results.
Adjusting Machine Settings
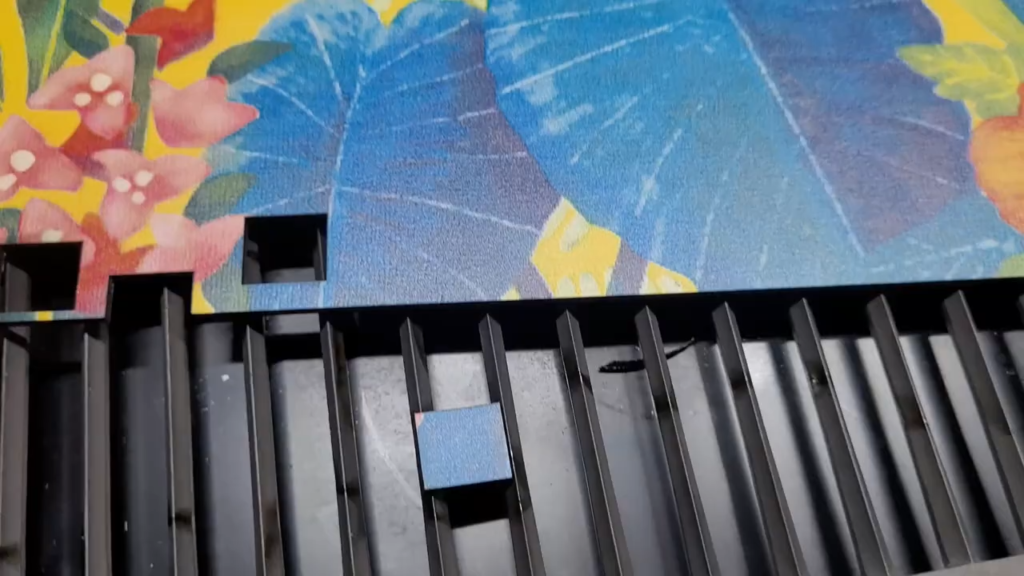
I grabbed some ugly patterned wood for test cuts and put it in the machine. I used some simple squares to test if the settings would cut through the material quickly. I increased the speed from 2 to 5 while keeping the power at 100.
Conducting Test Cuts
To my surprise, the Vista cut it out just fine! But when I increased the speed to 7, while it did cut out the square, it was harder to pop out and the cuts weren’t as clean.
So, I decided to meet in the middle and cut the full cat out at a speed of 6. The software estimated it would take 9 minutes and 34 seconds, but it actually finished in 8 minutes and 50 seconds..
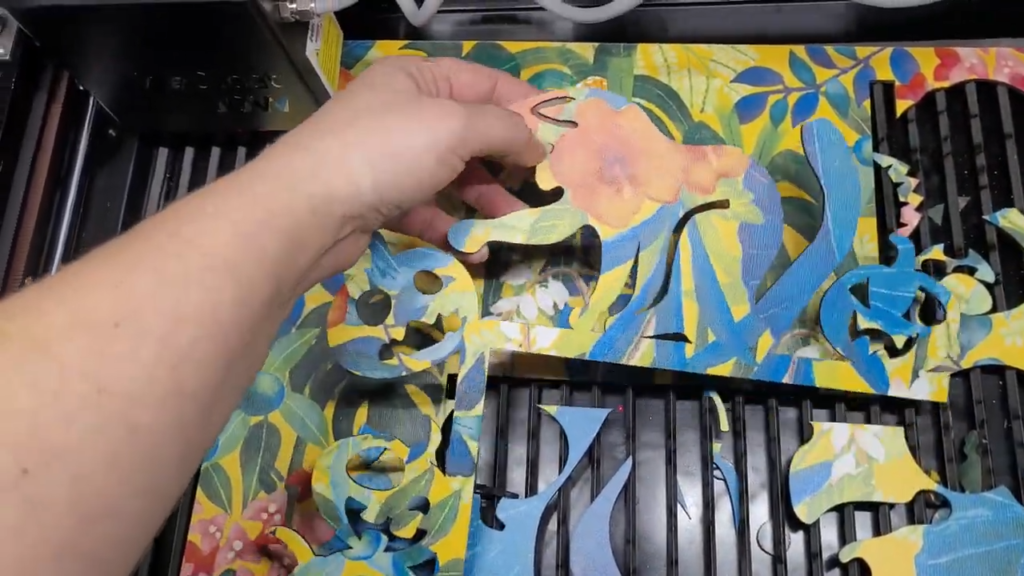
The laser cut all the way through, but the cat was a little harder to pop out than when cut at a speed of 2.
Finding the Sweet Spot
It’s all about finding that sweet spot between speed and quality. I learned that too fast can lead to messy cuts. But, slow isn’t always necessary either because it wastes your valuable machine time. The goal should be a balance.
Learning about our machine’s capabilities is vital. We need to track our project times to improve future accuracy. It’s this understanding that can truly change our crafting experience. Speed optimization can change the way you create!
‘The software estimated that it would take 28 minutes for this project.’
Understanding Basswood: The Material Choice
Basswood has become a go-to choice for many crafters, especially beginners. But what makes it so special?
Why Basswood is Ideal for Beginners and Detailed Projects
Basswood is often cited as a perfect wood for those just starting out. Why? For one, it’s lightweight, making it easy to handle. Also, it features a fine grain that cuts cleanly with minimal burning. This means you can get the detailed results you want without much hassle. Whether you’re crafting signs, jewelry, or even intricate decorations, basswood allows for great precision.
Comparison with Other Types of Wood
When comparing basswood to other woods, such as oak or pine, the differences are pretty significant. Oak is much heavier and harder, making it tougher to work with. Pine can be knottier, which complicates clean cuts. Basswood, on the other hand, offers a smoother, friendlier crafting experience.
Tips on Sourcing Quality Basswood for Crafting
Not all basswood is created equal. Here are a few tips for sourcing the best quality:
- Check for smoothness: Look for boards that are free of knots and imperfections.
- Research brands: Different brands can vary significantly in quality. Do your homework!
- Buy locally: Whenever possible, purchase from local suppliers. This makes it easier to inspect the wood before buying.
‘Basswood is a type of lightweight softwood known for its fine grain and smooth surface.’
Choosing the right wood can make a massive difference in your craft! I still remember the joy in successfully cutting my first basswood piece. It felt like I could tackle any project afterward.
So, if you’re considering what material to use next, think about giving basswood a try. You won’t be disappointed!
Crafting Your Own Story with We Create Vista
It’s always a good idea to do a small test cut if you’re working with a new material or brand, as each different company’s wood might be a little bit different.
Lower wattage lasers take longer to perform the same task as a higher powered laser, so if you’re interested in purchasing a 20-watt or 40-watt WeCreate Vision, you can save $100 by using promo code CRICUTER at checkout.
If you enjoyed this video and blog post, I’d love and appreciate it if you made the YouTube algorithm happy by smashing that thumbs up button on my channel, leaving a comment down below, subscribing, and turning on notifications.
Have you tried cutting something new? I’d love to hear about your experiences. Share your results and ideas in the comments. Each one of us brings something special to the table, and I’m thrilled to learn about your crafting stories. Your journey in crafting is just beginning—embrace it!
As we look to the future, I’m excited to promise you more tutorials and projects that will help
TL;DR: This post provides step-by-step guidance on using the We Create Vista to cut basswood for a Halloween decoration, with tips on design, speed tests, and best practices for beginners.
Cricuter’s Recommended Deals
- Sign up for Creative Fabrica’s FREE trial
- Sign up for Creative Fabrica’s discounted yearly subscription
- Shop the best deals on Cricut machines
- Accept credit card payments with your FREE Square Card Reader
- Check out my Linktree
Connect with Cricuter
Some of the links provided are affiliate links. Cricuter is a participant in the Amazon Services LLC Associates Program, an affiliate advertising program. As an Amazon Associate, I earn a commission on products purchased through these links at no additional cost to you.
