Crafting Memorable Family Moments: Mommy & Me Cricut Shirts
I can still recall that sunny afternoon when my daughter and I decided to dive into a crafting project together. Armed with our trusty Cricut machine and an endless supply of creativity, we embarked on a mission: to make matching cricut shirts that scream ‘Mommy and Me.’ Little did I know this simple activity would turn into a memorable bonding experience, filled with laughter, creativity, and, of course, a bit of chaos. In this post, I’ll walk you through the delightful steps of making your own mommy and me cricket shirts, blending crafting basics with quality family time!
TL;DR: Creating matching mommy and me cricut shirts is a fun-filled project that enhances family bonding, makes for adorable outfits, and introduces kids to crafting. Here’s how to get started!
Starting Your Crafting Adventure: Gathering Supplies and Setting Up
Getting started with crafting can feel overwhelming. I know—I’ve been there! The first thing we’ll need is a list of supplies. This includes:
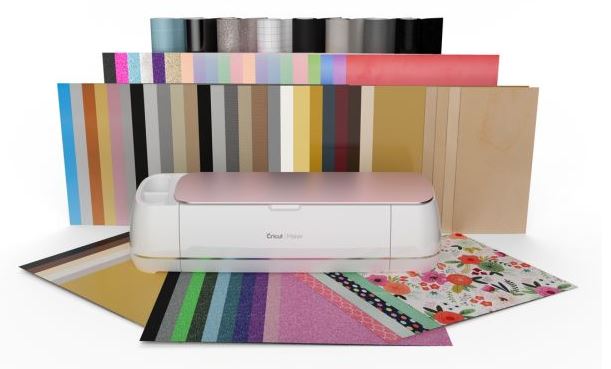
- Cricut machine
- Vinyl (I recommend Siser EasyWeed or Glitter vinyl)
- Heat press (better than an iron for durability!)
- Shirts (pick sizes that fit everyone)
- Cricut Design Space
- Lint roller (to prep your shirts)
Once we have our materials ready, it’s time to choose a comfortable workspace. Comfort is key when crafting, especially with kids involved. I often find my kitchen table is perfect, but you can use any flat surface. Make sure there’s enough light and space for everyone.
Involving Your Children

Making crafting a family affair? Great idea! Involve your children in the setup process. I usually set the supplies out and ask them to help sort everything. It’s a fun way to get them invested in the project. Trust me, your kids will find joy in being your little helpers!
As we organize, let’s make the space fun and exciting. Play your favorite music, or let the kids decorate their own crafting space with colorful markers. It’s about creating a joyful atmosphere—after all,
“Crafting with kids is less about the end product and more about the joy of being together.”
Crafting Chaos: My Personal Experience
So, embrace the chaos! It’s part of the crafting adventure. When you blend a sprinkle of fun with a dash of creativity, you create lasting memories. And that’s what makes it all worthwhile.
Designing Your Custom Shirts: Step-by-Step Guide
Creating custom shirts can be an exciting project for you and your kids. It’s a wonderful way to bond while letting creativity shine. So, how do we get started? In this guide, I’ll walk you through the steps of designing matching shirts for our little family.
Using Design Software

First things first, we need to use some design software to create unique graphics. I love using Cricut Design Space for its user-friendly interface. Whether you’re a seasoned designer or a newbie, it’s so easy to navigate. We can choose playful fonts and fun images. Imagine how satisfying it is to see your vision come to life on the screen!
- Choose a fun concept, like “Mommy and Me” for our shirts.
- Experiment with different designs—don’t be afraid to try new things!
It’s amazing to work alongside my kids. They offer fresh ideas, and their excitement is contagious. Incorporating their input makes the designs feel personal. Plus, it’s their shirt too!
Deciding on Colors and Layouts

Next up: colors and layouts. We gather around the computer and discuss our favorite colors. It’s fascinating to see what colors catch their eyes! I often ask, “What color would make our shirts shine?” It helps create a fun atmosphere, filled with laughter and creativity.
It’s important to resize the text properly. For children’s shirts, the design size should be around 5.5 inches x 6 inches. Why is this important? If the text is too big or too small, it won’t look right on the shirt. Imagine trying to read tiny letters from afar—it just doesn’t work! So, we measure and adjust accordingly.
Common Mistakes to Avoid
When designing, we sometimes make mistakes. One common error is forgetting to mirror the design before cutting. Remember, when using heat transfer vinyl, the design has to be flipped! By guiding my children through corrections, we learn together.
As we dive into the crafting process, I remind myself:
“Designing is a journey, not just a destination.”
It’s about the fun we have along the way.
With the right software, colors, and layouts, we’re ready to create our unique shirts. I can’t wait to see the final results! In the meantime, let’s keep our spirits high and enjoy every moment of this creative adventure together!
Cutting and Weeding: The Art of Patient Crafting with Kids

Teaching Our Little Ones the Cricut Way
Have you ever tried to explain a new gadget to children? It can be a mix of excitement and challenge. Teaching children how to operate the Cricut machine safely is crucial. Always supervise them closely. I start by showing my kids, Sierra and Barrett, how to load the vinyl and adjust the machine settings. It’s fascinating to watch their little faces light up. They feel a sense of responsibility.
Plus, explaining the various buttons helps them understand more about technology. “This button starts the cutting, and this one reverses,” I usually say. It feels great when they pick it up quickly! Encourage them. Their confidence grows with each project.
The Importance of Weeding
After cutting, we come to a fun part: weeding out the excess vinyl. Why is this so important? Weeding allows us to focus on the design, making it clean and precise. Children often feel like little detectives as they search for every tiny piece to pull away. Sometimes, we find a rogue piece that tries to escape!
I love to use a weeding tool, and I make it a game. Who can find the fastest way to weed a letter? Occasionally, we share a laugh because, let’s be honest, some letters can look like scribbles from a toddler’s drawing, thanks to our creative interpretations.
Keeping Kids Engaged

It’s no secret that patience and practice are key when crafting with kids. How do I keep them engaged during this task? I use a blend of music, games, and a sprinkle of patience. We often have a mini dance break while waiting for the machine to cut!
As Joyce Meyer said,
“Patience is not simply the ability to wait – it’s how we behave while we’re waiting.”
This truly rings true during our crafting sessions. Making crafting a joyful experience rather than a chore is essential.
- Keep tasks short and exciting.
- Incorporate playful elements.
- Celebrate small victories together.
- Share funny reactions to messy moments.
Crafting projects with my children not only allows me to teach them valuable skills, but it also builds our bond as we create together. The joy of seeing my five-year-old weeding her first Cricut project is something I will treasure forever!
Heat Pressing Magic: The Final Touches for Your Shirts

Let’s dive into the enchanting world of heat pressing! I remember the thrill I felt when I first pressed my handmade shirts. It’s a magical moment, watching your designs come to life. Are you ready to experience that too?
1. Preparing Your Heat Press
First things first, we need to prep our heat press. Safety is key here. Always set up your heat press on a stable surface. Never leave it unattended. Remember, it gets hot!
As I watched my kids explore this process, I couldn’t help but share a few safety tips:
- Always use heat-resistant gloves.
- Keep a bottle of water nearby, just in case.
- Allow the machine to cool before cleaning or touching.
With safety in mind, we set the ideal heat setting to 300°F for 20 seconds—perfect for vinyl adhesion.
2. Pressing the Shirts
Next up, it’s pressing time! I carefully place each shirt onto the heat press, aligning the design perfectly. The kids can’t help but peek at what’s happening. “Is it done yet?” they ask. The anticipation is real.
As we lower the heat press, I share the importance of ensuring vinyl adhesion. It’s essential that the design sticks. Too little time, and it won’t hold. Too long, and you risk burning it. It’s all about timing.
3. The Exciting Reveal

After the final beep, we lift the press. With bated breath, we peel back the protective layer to unveil the designs. Their faces light up with glee. This, my friends, is what I live for!
The joy of seeing your hard work rewarded is incredible. I love witnessing that moment with my kids. They dance around in their new matching “Mommy and Me Cricketer Team” shirts. It’s a delightful sight, filled with laughter and creativity.
In this journey, the blend of crafting and family bonding shines through. Whether you’re pressing shirts for a sports team or a family event, the final touches are where the magic happens. Are you ready to experience this excitement together?
Celebrating Your Creation: Wearing Your Mommy & Me Shirts
Wearing our newly crafted shirts as a family brought us so much joy! There’s something special about matching outfits that unites us. It’s not just about the shirts; it’s a beautiful reminder of the fun we shared while making them. Every time we wore those shirts, we felt like a team—our own little “Mommy and Me Cricketer Team.”
Picture Perfect Moments
Taking pictures in our shirts became an adventure in itself. Here are a few tips that helped us capture the moment:
- Choose the right background: A colorful setting enhances the visual appeal. Think parks or bright walls!
- Use natural light: Early mornings or late afternoons provide the best lighting for capturing vibrant colors.
- Get candid: Some of the best photos are those captured when we’re laughing or playing together.
Social media is a great platform to share these moments. I found that posting pictures of us in our matching shirts made friends and family smile. And who doesn’t love a good “Mommy and Me” moment?
Reflecting on Our Crafting Journey
As we wore our creations, it gave us a moment to reflect. What did we learn during the crafting process? Patience was key. Sometimes things didn’t go as planned, but we learned how to adapt and make adjustments. Sierra especially thrived in the creative process. Watching her choose designs and colors was enlightening. It reminded me to embrace creativity, even when things get messy.
Encouragement for Future Projects
Moving forward, I encourage everyone to try out new designs and to share them! Whether it’s a different theme or a new crafting technique, there’s always something fresh to explore. The bonding moments we create through these projects are truly irreplaceable. And as I often say,
“The memories we create with family are the most precious gifts of all.”
In closing, we had such a fantastic time wearing our “Mommy and Me” shirts. Not only did it enhance our family bond, but it opened doors to future crafting adventures. So, how about you say “mommy” and I say “me?” Let’s keep exploring and creating together!
Cricuter’s Recommended Deals
- Sign up for Creative Fabrica’s FREE trial
- Sign up for Creative Fabrica’s discounted yearly subscription
- Shop the best deals on Cricut machines
- Accept credit card payments with your FREE Square Card Reader
- Check out my Linktree
Connect with Cricuter
Some of the links provided are affiliate links. Cricuter is a participant in the Amazon Services LLC Associates Program, an affiliate advertising program. As an Amazon Associate, I earn a commission on products purchased through these links at no additional cost to you.
