The Best Cricut Hacks: Simple Tips Every Crafter Should Know
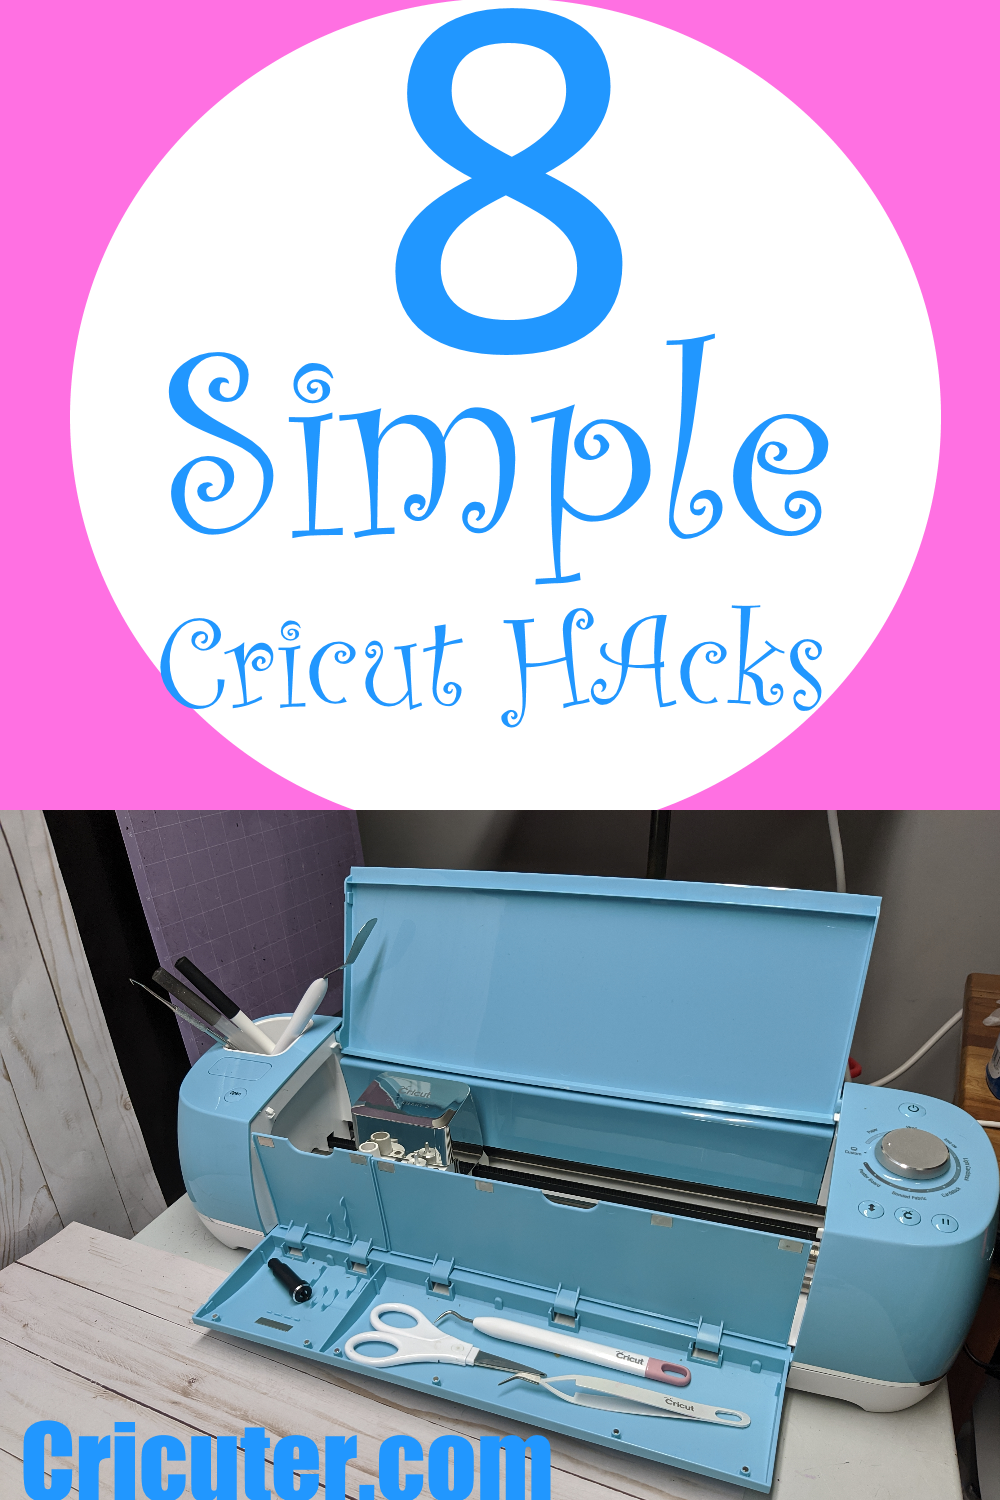
Calling all Cricuters! I’ve got a ton of simple Cricut hacks to make you a better and more efficient Cricuter! Whether you’re just starting out with a Cricut, or you’ve made more crafts than you can count, everyone can learn something new from these great tips and tricks.
Maintaining Your Cricut Tools and Workspace
How to Clean Your Cricut Blades for Optimal Performance
Maintaining your Cricut blades is essential for ensuring precise cuts and extending the lifespan of your equipment. Here are some simple yet effective Cricut hacks to keep those blades in top condition:
- Gather Your Supplies:
- Small ball of aluminum foil
- Cleaning Process:
- Once a week, or whenever you switch between different materials, take the aluminum foil and form it into a tight ball.
- Gently poke the blade into the ball several times. This action helps remove dirt and debris that accumulate on the blade.
By consistently following this routine, your Cricut blades will remain sharp and deliver cleaner cuts, enhancing your crafting experience significantly.
Keep Your Mats Clean!
There’s nothing worse than being down to your last cut of the day on your last piece of vinyl and having the whole thing move because your mat just isn’t sticky enough!
The first of these Cricut Hacks is a simple one: A clean mat will make sure that your material stays in place while cutting it.
Start gently with your flat scraper to remove large debris, and after that there are a couple very popular methods people use to clean their mats:
Baby Wipes!
Yes, that’s right! Baby Wipes are great for cleaning your mats because they’re soft and damp enough to clean your mat without harming the mat or its stickiness.
Just make sure the wipes you buy are bleach and alcohol free or it will damage the stickiness of the mat.
Lint Rollers!
Lint rollers are great tools for cleaning your mats. They can grab stuff you cant get off with baby wipes or with your scraper.
Roll it over the surface slowly to remove tough stuck on bits of whatever. Also, some of the stickiness from the roller can be transferred to your mat just by using it!
Sometimes, though, there’s really no better feeling than peeling a big piece of vinyl off of a brand new, fresh mat.
I like to buy a new mat every so often because nothing works better than a brand new mat.
Make Your Mat Sticky Again!
Sometimes, cleaning your mat just isn’t enough to make it stick like new. Fortunately, there’s an easy Cricut hack to solve this issue!
Using Adhesive Spray
There’s an adhesive spray called Krylon Easytack that can get your mat nice and sticky again.
First, tape off the edges of your mat with painters tape so they don’t get sticky. A Mat that’s sticky in the wrong places can damage your machine.
All you have to do is make sure you clean your mat well, then remove any remaining stickiness with rubbing alcohol or Goo Gone and scrape off any residue left.
Once it’s all clean, spray the surface evenly to coat it with the adhesive spray. Follow the instructions on the label for the best results.
Wait Time for Sticky Mat
It takes about 15-20 minutes for your spray to cure. Now you have a wonderfully sticky mat again!
Sometimes, though, there’s really no better feeling than peeling a big piece of vinyl off of a brand new, fresh mat.
I like to buy a new mat every so often because nothing works better than a brand new mat.
They’re also very reasonably priced, with 3 packs sometimes going on sale for less than $10.
Temporary Fix for a Damaged Cutting Mat
Accidentally cut through your cutting mat? Don’t worry; next on our list of Cricut hacks, there’s a quick fix to extend its life while you wait for a replacement. Here’s what you can do:
Choose Strong Tape
Opt for a durable tape, like duct tape or packing tape. These types of tape offer the strength needed to hold the mat together.
Apply Tape to the Back
Flip the mat over so the back is facing up. Place the tape directly over the cut area, pressing firmly to ensure good adhesion.
Smooth Out Bubbles
Use a flat object, like a credit card, to smooth out any air bubbles or wrinkles in the tape. This ensures a more stable cutting surface.
Note: This is a temporary solution. Be cautious and gentle while using the mat to prevent further damage.
With this handy tip, you can continue your projects without missing a beat!
Improving Crafting Techniques
Get The Right Tools
Next on our list of Cricut Hacks is a real time saver. I can’t tell you how much time I spent fumbling around with good enough weeding tools when I could have made a small investment in myself and had the right tool for every job within easy reach.
Buy some good tools to really increase your productivity and start making money.
Cricut Essential Tool Set
I really like the Cricut Essential Tool Set. It comes with 7 pieces and includes all the tools you need to slice, snip, score, weed, burnish, and trim a wide variety of materials.
It’s perfect for vinyl, paper, iron-on projects and more.
It also comes with a really handy vinyl cutter to quickly cut your vinyl to size off of the roll
Buy A Good Heat Press!
This may not be one of the true Cricut hacks, but it is still very important if you want to make quality products, Don’t keep using that tiny iron to try to make T Shirts and Clothing.
A good heat press makes your designs last longer and look nicer.
If you use an iron, your designs probably wont hold up to the wash well.
If you plan on using your Cricut for business use, you’ll definitely want to invest in a heat press. Heat presses are best for a lot of reasons.
Accurate Temperature
Heat presses are better than irons because you can precisely set the temperature.
This is important because HTV must be applied at an exact temperature (305° F / 150° C for Siser Easyweed HTV).
Irons let you set the temperature based on fabric type (cotton, linen, wool, etc.) but they don’t give you a numerical reading.
It’s a great idea to buy a digital laser infrared thermometer gun to ensure your heat press is heating correctly.
Even Heat Distribution
You need to have even heat distribution when applying your HTV. You don’t want one part of your machine to be really hot, and another part to have cold spots.
One of the most common problems with cheaper heat presses is that they don’t have even heat distribution.
Even Pressure
It’s important to have the correct pressure, (light, medium, or heavy) for your substrate and material. You need to know pressure will be evenly applied evenly and at the right strength.
Pushing down with a hand iron will not give you the same pressure that you will get with a heat press.
Irons are much smaller than heat presses, so you’ll have to press the garment several times to cover the design.
You’ll likely end up with uneven lines in the vinyl from this, too. HTV applied with an iron would not hold up in the wash as well either compared to if it were applied with a heat press.
Digital Timer
HTV needs to be applied for a specific duration of time (10-15 seconds for Siser Easyweed HTV). You don’t want to be fumbling around with a phone timer or trying to count in your head.
Having incorrect temperature, heat distribution, pressure, or time will cause the HTV to peel off your garment.
Clamshell or Swing Away Heat Press?
There are two main types of heat presses: Clamshell or Swing Away.
Clamshell Heat Presses are machines that open and close like a clam. The top platen raises approximately 45 degrees and lowers until you make contact with the bottom platen at which point you snap the press closed. I don’t like this style because you are more likely to get accidentally burned.
Swing Away Heat Presses are designed so that the upper platen swings away from the lower platen, rather than hinging up and down like a clamshell. It’s easier to adjust your garments with the burning hot platen moved out of the way.
Heat presses come in many different sizes. If you are planning on making shirts, you’ll want to get a heat press of at least 15 by 15 inches.
Having incorrect temperature, heat distribution, pressure, or time will cause the HTV to peel off your garment.
Alternatives to an EasyPress Mat
If you don’t have an EasyPress mat, don’t worry. There are effective alternatives available.
Firstly, a thick terry cloth towel can be a great substitute. When using a towel, fold it three or four times to create a cushioned but firm surface. This will help distribute the pressure evenly across your design, ensuring good adhesion for your heat transfer vinyl.
Steps to Use a Towel:
- Fold the Towel: Fold it neatly to achieve the desired thickness.
- Setup: Place the folded towel on a sturdy table or countertop. It’s crucial to have a rigid surface to apply the necessary pressure consistently.
- Press Down Firmly: Ensure you’re pressing down with consistent, even force to achieve the best results.
Alternatively, a silicone baking mat can also be a good option. Its heat-resistant properties make it suitable for transferring designs without causing burns or damage.
Steps to Use a Silicone Baking Mat:
- Position the Mat: Place the baking mat on a solid, stable surface.
- Layering: You may want to add a folded towel underneath for additional padding and pressure distribution.
- Apply Heat: Proceed with your heat transfer process, ensuring that you maintain even pressure.
These alternatives can help you achieve professional results without needing any specialized equipment.
The Importance of Burnishing in Vinyl Projects
One of the most simple Cricut hacks to improve the quality of your product is burnishing.
What is Burnishing?
Burnishing is a vital step in vinyl crafting that ensures your project adheres perfectly, whether it’s on a car window, a wall, or a mug.
It’s the process of firmly pressing materials together using a tool, usually a scraper or a specialized burnishing tool.
Why Burnishing Matters
Improves Adhesion
Proper burnishing before weeding helps the vinyl stick firmly to the transfer tape. This ensures that intricate designs don’t get left behind on the mat.
Reduces Bubbling
Burnishing from both the front and the back removes air bubbles, which can ruin the clean look of your design.
Increases Durability
By firmly pressing the vinyl, burnishing enhances the final product’s durability, making it less prone to peeling or lifting over time.
Step-by-Step Guide to Burnishing
- Initial Burnish: After cutting your design on the mat, use a burnishing tool to press the vinyl onto the mat. This ensures all sections are properly adhered.
- Burnish After Weeding: Once you’ve weeded out the excess material, apply transfer tape and burnish again. This secures the vinyl design to the tape.
- Final Burnish: After transferring the design to its final surface, flip it and burnish the back. This step solidifies the vinyl’s adherence to the surface.
Key Takeaways
- Consistency is Key: Don’t skimp on burnishing. Multiple rounds can make all the difference in the success of your project.
- Use Proper Tools: A quality burnishing tool, whether a credit card, a scraper, or a specialized tool, can make this process much easier and more effective.
In summary, burnishing is a crucial process that improves the quality and longevity of your vinyl projects. By enhancing adhesion and eliminating bubbles, you’ll achieve a professional finish every time.
How to Use a Safety Pin for Weeding Intricate Designs
Weeding intricate designs can be challenging, especially if you don’t have specialized tools on hand. However, a simple safety pin can serve as an effective alternative when you’re in a pinch. Here’s how to do the next thing on this list of Cricut hacks
Materials Needed:
- Safety pin
- Vinyl or material with intricate designs
Preparing the Safety Pin:
- Open the pin and ensure the point is sharp and free from rust.
Start Weeding:
- Carefully pierce the vinyl at the edges of the design.
- Lift away the unwanted sections.
Handling Small Details:
- Use the tip of the pin to navigate tight corners or delicate areas.
Cleanup:
- After finishing, close the safety pin and store it.
Using a safety pin can be surprisingly effective when traditional weeding tools are unavailable.
This simple tool provides the precision needed to manage detailed designs, ensuring your project stays on track even in unexpected circumstances.
Organizing Materials and Workspaces
How to Save and Utilize Vinyl Scraps Effectively
After cutting out your vinyl design, it’s essential to manage the leftover pieces efficiently. These Cricut hacks are all about how to make the most out of those scraps:
Trim Excess Material
Use a precision knife to carefully trim away any excess vinyl from around your design. This helps in organizing your scraps for future use.
Organize and Store Scraps
Separate your vinyl remnants by color and type. Store them flat in labeled folders or transparent bags to keep them easily accessible.
Creative Reuse
Utilize these smaller pieces for smaller projects such as decals, labels, or intricate designs. This maximizes your resources and minimizes waste.
Save Specialty Materials
Don’t forget about other specialty crafting materials like printable sticker paper and iron-on fabrics. These can also be cut into smaller sections for future projects.
By following these tips, you’ll not only save money but also contribute to reducing waste, making your crafting more sustainable.
Tips for Storing Vinyl Sheets and Scraps for Easy Access
Proper organization of your vinyl sheets and scraps can save you time and hassle. Here are some effective tips to keep everything in order:
Scrapbook Albums for Sheets
To organize and store your vinyl sheets, opt for a 12 x 12 scrapbook album with page protectors, which allows you to keep everything flat and easily accessible.
School Binders For Scraps
For scraps, regular school binders with plastic page protectors are a practical solution, enabling easy visibility and access.
Clear Storage Bins
Craft stores offer specialized storage boxes designed for various materials, including vinyl sheets and scraps, with compartments that help keep everything organized. T
hese methods help streamline your crafting materials for better efficiency and ease of use.
How to Keep Rolls of Vinyl Neat and Organized
Struggling with a clutter of vinyl rolls? These Cricut hacks are about keeping them orderly can be simple and efficient with a few clever tricks.
Use Toilet Paper Rolls
First, grab some empty toilet paper rolls you have lying around. Slice one side open and wrap it around your vinyl roll.
This little trick keeps your vinyl from unraveling. Make it even more functional by labeling the toilet paper roll with a marker.
Note down the type of vinyl and the purchase date for quick identification.
Rubber Bands for Color Coding
Another effective solution is to use rubber bands. Color-code your vinyl rolls to distinguish between different types. For instance:
- Blue for basic vinyl
- Pink for heat transfer vinyl (HTV)
- Yellow for specialty vinyl
This way, you can easily spot what you need without rummaging through your collection.
Pegboard Storage
Install a pegboard on your crafting room wall. Use hooks or pegs to hang the vinyl rolls
This not only keeps them upright and intact but also makes them easily accessible.
Plus, you can see your entire collection at a glance.
Clear Storage Bins
Invest in clear storage bins with fitted lids. These bins protect your vinyl from dust and damage.
Stack them neatly on shelves or tuck them under your workspace.
Label each bin to quickly identify the contents inside.
Vertical Shoe Rack
A vertical shoe rack can be a game-changer. Place each vinyl roll into the shoe slots. This method is space-saving and keeps each roll separate yet visible.
Experiment with these methods to find which mix suits your crafting space best.
An organized vinyl collection not only looks great but also enhances your crafting efficiency.
How to Keep Track of the Age of Your Vinyl
Vinyl Age Matters
One of the thigs I learned is that some of the most important Cricut hacks are about keeping your tools and materials in good shape.
As vinyl ages, it can become harder to cut, weed, and apply. Furthermore, aged vinyl might not adhere as well or last as long on your projects.
To ensure you’re using your vinyl at its best, keeping track of its age is essential.
Mark Your Vinyl
Using a permanent marker, note the purchase date on the backing paper of your vinyl sheets and scraps. This will help you identify older materials, ensuring you use them first.
Label Rolls
For vinyl rolls, consider using adhesive labels to mark the purchase date. This helps you quickly identify which rolls are the oldest.
Storage Solutions:
Clear Bins or Shelves: Store your vinyl in clear bins or on shelves where the labels are easily visible. This makes it easier to see and access the older vinyl.
Organization Tools: Invest in tools like vinyl roll holders or racks which can help keep everything organized and in plain sight.
Practical Tips
- Rotate Stock: Adopt a ‘first-in, first-out’ (FIFO) approach in your storage. Always use the oldest materials first to prevent them from deteriorating.
- Regular Inventory Checks: Periodically review your vinyl supplies. If you notice any aging or damage, prioritize those sheets or rolls for your next projects.
By following these tips, you can maintain the quality of your vinyl and ensure each piece performs at its best, leading to successful and long-lasting craft projects.
Handling Different Materials
How to Clean Surfaces Before Applying Vinyl or Infusible Ink
For the best results with your craft projects, cleaning your surfaces thoroughly before applying vinyl or Infusible Ink is crucial. Here’s some Cricut hacks about prepping various types of surfaces:
Non-Porous Surfaces (Ceramic and Glass)
- Use Rubbing Alcohol: Apply rubbing alcohol on a paper towel and wipe down the surface. This will effectively remove any dirt, dust, oil, and debris.
- Lint Roller: For extra cleaning power, consider using a lint roller before applying the rubbing alcohol. This step helps pick up any loose particles that could interfere with your project.
Porous and Delicate Surfaces (Fabric, Wood, etc.)
- Lint Roller for Fabric: Use a lint roller to remove loose threads, dust, and debris. It’s a quick and effective way to ensure a clean surface.
- Soft Cloth for Wood: Use a clean, soft cloth to dust off dirt and debris. For stubborn areas, slightly dampen the cloth with water but avoid soaking the wood.
General Tips
- Double Check: Always inspect your surface after cleaning to make sure there are no remaining particles.
- Environment: Ensure your workspace is clean and free of dust, which can easily settle back onto your freshly cleaned surface.
By following these steps, you’ll significantly improve the adhesion and overall finish of your vinyl and Infusible Ink projects.
How to Apply Vinyl to Curved Surfaces Like Mugs or Ornaments
Applying vinyl to curved surfaces, such as mugs or ornaments, can be a bit tricky. However, with the right Cricut hacks, you can achieve smooth and long-lasting results.
Step-by-Step Guide:
Prepare Your Transfer Tape
Start by cutting slits into your transfer tape. This simple step allows the tape to conform more easily to the curved shape, preventing creases and ensuring better adherence.
Apply the Vinyl
Carefully place the vinyl onto the surface, using the modified transfer tape. Work slowly, pressing down on the vinyl as you go to make sure it sticks well.
Smooth Out Bubbles
If you encounter bubbles, use a small scraper or your fingernail to smooth them out. The slits in the transfer tape make it easier to eliminate these bubbles effectively.
Tips for Success:
- Work in Sections: Tackling the application in smaller sections can help you manage the curve more effectively.
- Apply Heat: Using a hairdryer to gently warm the vinyl can make it more pliable, further enhancing its ability to adhere to curved surfaces.
- Use a Soft Cloth: Sometimes, using a soft cloth to press the vinyl down can help achieve a smoother finish.
Following these steps will help you apply vinyl to curved surfaces with ease, ensuring a professional and lasting result.
How to Use Contact Paper When Cutting Felt with a Cricut Machine
Cutting felt with a Cricut machine can often result in a messy cutting mat covered with tiny fibers. However, there’s a simple Cricut hack to avoid this issue: using contact paper.
Step-by-Step Instructions:
- Choose Your Contact Paper: Opt for clear contact paper to see the felt, but any type will work just fine.
- Apply the Contact Paper: Place the contact paper on the back side of your felt. Ensure it’s smooth and free of wrinkles.
- Prepare the Cutting Mat: Place the felt (with contact paper backing) onto the Cricut cutting mat, with the felt side facing up.
- Cut as Usual: Load the mat into your Cricut machine and proceed with cutting your design.
Benefits of This Method
- No Mess: Prevents felt fibers from sticking to the cutting mat, making cleanup easier.
- Versatile Application: Works well with other fabric types prone to shedding, such as burlap.
Tips for Best Results
- Adhesion: Ensure the contact paper sticks well to avoid shifting during cutting.
- Cut Settings: Adjust your machine settings according to the thickness of your material and the added contact paper layer.
By incorporating contact paper into your cutting process, you can achieve cleaner cuts and maintain a tidy workspace.
Weeding and Design Visibility Tips
How to Change the Canvas Color in Design Software for Better Visibility
Sometimes the best Cricut hacks are the ones that make things easier to see.
Working with a default white canvas in design software can sometimes make your designs harder to see. Thankfully, you can easily change the canvas color to improve visibility.
Here’s a step-by-step guide to help you:
- Select the Blank Canvas:
- Click on the area labeled Blank Canvas. This is near the bottom of the layers panel. This should highlight or open a new set of options.
- Open the Color Menu:
- Navigate to the top menu bar and look for the Color option. This is typically represented by a square or an icon suggesting color.
- Choose Your Preferred Color:
- A dropdown menu will appear once you click on the Color option. From here, you can select your desired canvas color.
- Access Advanced Options:
- For more color choices, click on Advanced in the dropdown menu. This will provide an extended color palette, giving you a broader range of hues to choose from.
By following these steps, you can swiftly change your canvas color and ensure that your designs stand out, enhancing your overall visibility and workflow.
How to Improve Visibility When Weeding Designs
Having good visibility when weeding designs is a recurring theme on this list of Cricut hacks. Here are several methods to help you see your cut designs more clearly:
Proper Lighting
Working in well-lit areas can make a significant difference.
If your home lighting isn’t sufficient, consider enhancing it with a lightbox or placing your work near a window that gets plenty of natural light.
Headlamp for Focused Lighting
Wearing a headlamp provides targeted illumination, allowing you to focus light exactly where it’s needed. This is especially useful for intricate designs or darker materials.
Using Baby Powder
For darker vinyl surfaces, sprinkle baby powder over the cut lines. Brush away any excess; the powder will settle into the lines, making them more visible.
How Weeding on the Mat Can Be Beneficial for Vinyl Projects
Weeding on the mat is one of many Cricut hacks that can streamline your vinyl crafting process.
Added Stability
Keeping your design on the mat provides extra stability, much like having an additional hand. This stability allows you to work more efficiently and with greater precision.
Enhanced Adhesion
After cutting your vinyl design, using a burnishing tool to press the vinyl firmly onto the mat ensures it stays in place.
This adhesion is crucial for maintaining the integrity of your design during the weeding process.
Precision During Weeding
When you begin to weed, the mat helps to secure the sections you want to keep.
This security ensures that only the areas you intend to remove will lift, making the weeding process more accurate and less frustrating.
Improved Workflow
Overall, the combination of stability, adhesion, and precision enhances your workflow.
You can focus on the details of your design without worrying about it moving or lifting unexpectedly.
By leveraging the mat in your vinyl projects, you can achieve cleaner results and enjoy a more streamlined crafting experience.
Efficiently Weeding Large Vinyl Projects
Tackling a large vinyl project can seem daunting, but breaking it into sections is next on our list of Cricut hacks. Here’s a step-by-step guide to make weeding more manageable:
- Divide and Conquer: Approach your vinyl design in smaller, more manageable sections. This method prevents you from getting overwhelmed and allows for better precision.
- Ball Up Excess Vinyl: As you weed each section, gather the excess vinyl and form it into a small ball in your hand. This keeps unwanted material from cluttering your workspace.
- Periodic Cleanup: After working on a few sections, cut away the collected excess vinyl. This ensures that the weeded vinyl doesn’t interfere with your ongoing work and keeps your area tidy.
- Use Quality Tools: Invest in reliable weeding tools from brands like Cricut or Silhouette. The right tools can make the process faster and reduce the strain on your hands.
- Adequate Lighting: Ensure your workspace is well-lit. Good lighting helps you see fine details, reducing errors and making the weeding process smoother.
By following these steps, you can tackle large vinyl projects with greater efficiency and ease.
What is Reverse Weeding and How Can It Help with Intricate Designs?
Reverse weeding is a technique often used in vinyl crafting that can make managing tiny, intricate designs much simpler.
Unlike traditional weeding, where you remove excess material directly from the backing, reverse weeding employs transfer tape first, making it easier to handle delicate details.
Step-by-step guide to Reverse Weeding:
- Apply Transfer Tape First: Start by placing a piece of transfer tape over your entire design before any weeding takes place.
- Flip and Remove Backing: Carefully flip the design over and peel away the backing material. This leaves your vinyl design adhered to the transfer tape.
- Weed on Transfer Tape: Now, you can begin to weed on the transfer tape rather than the traditional backing. This offers more control and reduces the risk of tearing intricate parts of your design.
Benefits of Reverse Weeding
- Enhanced Precision: Since the design sticks to the transfer tape first, small elements remain secure, reducing the risk of losing fine details.
- Reduced Misplacement: Removing the backing first ensures that every piece stays exactly where it should be within the design.
- Simplified Handling: Working with transfer tape provides a more stable surface, making it easier to manage and maneuver small or intricate pieces.
This method can be a game-changer, especially for those working with elaborate patterns and detailed artwork, offering greater precision and ease.
How to Remove Vinyl from Mugs
Removing vinyl from mugs can be a hassle, but there’s some easy Cricut hacks to get the job done quickly and cleanly.
- Heat the Vinyl: Use a heat gun or a blow dryer to warm the vinyl. The heat softens the adhesive, making it easier to remove.
- Peel with Precision: While the vinyl is still warm, use a weeding tool or a craft knife to lift the edges. Gently peel away the vinyl from the surface.
- Clean Up: If any adhesive residue remains, use a mild adhesive remover or rubbing alcohol to clean the mug.
This straightforward approach helps ensure that the vinyl comes off without leaving any stickiness behind.
General Cricut Crafting Tips
How Adding Shapes in Design Software Enhances Project Visualization
One of the best Cricut hacks dramatically enhances the visualization of finished projects. This technique involves creating a basic shape on your digital canvas that mirrors the dimensions of your actual project space.
For example, if you’re working on a picture frame with a 6 x 8 inch flat surface, you would create a rectangle in your design software of the same size.
Here’s how this can be beneficial:
- Accurate Sizing: By matching the shape to your project’s dimensions, you can accurately size your design elements to fit perfectly within the space.
- Design Preview: Visualizing the finished project helps you see how your design will look on the actual object, letting you make tweaks before any physical work begins.
- Adjustments and Enhancements: Spot potential issues and adjust colors, shapes, or placements to optimize your design, ensuring the final result meets your vision.
Using shapes for visualization in design software not only provides a more realistic preview but also saves time and materials by minimizing trial and error.
Can Off-Brand Pens and Markers Be Used in Cricut Machines?
Absolutely, off-brand pens and markers can indeed be used in Cricut machines, often with great results.
Not only are they more affordable, but many users find them to be just as effective.
If you’re willing to experiment, you can achieve high-quality results without breaking the bank.
How to Make Off-Brand Pens and Markers Fit
- Adjusting Pen Thickness:
- If your chosen pen or marker is too thin for the Cricut clamp, try wrapping a rubber band around it to increase its diameter. This simple trick can make a huge difference in securing the pen snugly in place.
- DIY Pen Holder:
- Another approach is to modify an inexpensive marker or pen that fits well in the clamp. Remove the ink cartridge and any other internal components. This hollowed-out shell can then act as a custom holder for thinner pens or markers.
By using these methods, you can expand your range of compatible writing tools, enabling more creativity and customization in your Cricut projects while saving money.
Why Duplicate and Hide Your Design Before Welding?.
Duplicating and hiding your design before welding is a strategic step that can save time and prevent potential mishaps. Here’s why you should consider this practice:
Error Prevention
Welding can merge elements in ways that might not turn out as planned. By duplicating your design before this final step, you keep a pristine version safe from errors.
If something goes wrong, you can easily revert to the original copy.
Efficient Customization
When working on personalized projects, like creating custom messages or names, duplicating your base design allows for quick adjustments.
For instance, if you’re crafting items that say, “Have a great day, [Name],” you can change the name without redoing the entire design.
Time-Saving Backup
Think of the duplicated design as a backup. If your welded version gets altered or corrupted, you won’t need to recreate your work from scratch.
Instead, you can simply recall the hidden duplicate and proceed with minimal disruption.
Consistency in Batch Production
If you’re producing multiple items, this method ensures consistency. Each piece stems from the same duplicated design, maintaining uniformity across your creations.
It keeps your process streamlined and your results professional.
By incorporating this step into your workflow, you increase your efficiency and safeguard your creative process, making your projects more manageable and less prone to costly errors.
How to Center Your Designs Easily on T-Shirts
Centering your designs on t-shirts can be a breeze with a few simple techniques. Follow these steps to ensure your design is perfectly positioned:
- Fold and Press: Start by folding the t-shirt in half lengthwise. Press it lightly to create a visible crease. This crease serves as your center line, helping you accurately align your design.
- Create a Starting Point: For an additional guide, fold the shirt horizontally at the point where you’d like the top of your design to begin. Generally, a good rule of thumb is about 3 inches below the neckline.
- Use Markers for Larger Designs: When working with larger designs, it can be tricky to line them up perfectly. To help with this, use a dry erase marker to mark the center point of your design on the transfer tape. This added reference makes the alignment process easier and more precise.
- Visual Check: Before committing to the press, take a moment to step back and visually inspect the alignment. Make adjustments as needed.
By following these straightforward steps, you can effortlessly center your designs, ensuring a professional and polished look every time.
Summary
There you have it! These Cricut hacks are designed to make your crafting journey smoother and more fun!
Whether you’re keeping your mats clean, organizing your vinyl, or using clever tricks like a safety pin for intricate weeding, these tips can save you time and hassle.
By incorporating these simple solutions, you’ll feel more confident and prepared to tackle any project, big or small. So grab your tools, get creative, and enjoy the process with these easy, helpful hacks.
Happy crafting!
Cricuter’s Recommended Deals
- Sign up for Creative Fabrica’s FREE trial
- Sign up for Creative Fabrica’s discounted yearly subscription
- Shop the best deals on Cricut machines
- Accept credit card payments with your FREE Square Card Reader
- Check out my Linktree
Connect with Cricuter
Some of the links provided are affiliate links. Cricuter is a participant in the Amazon Services LLC Associates Program, an affiliate advertising program. As an Amazon Associate, we earn from qualifying purchases. This means, at no additional cost to you, we will earn a commission if you click through and make a purchase.
